Why work with us?
We build on relationships with partners, suppliers, and customers. A strong support system and positive relationships lead to project success and a positive experience.
High Quality Materials
Our materials meet or exceed all relevant standards, ensuring top quality.
Detailed Guides
We provide detailed support to customers and partners at every stage. From ordering the kit to correct installation and maintenance.
Technical Support & Parts Availability
If you have any technical queries, we are here to assist. Given our direct collaboration with a factory, we are pleased to offer support for spare or custom parts.
On site visits and training
Our experts will come to your site to provide guidance on the proper fence installation procedures.
Access to updates, Revisions, News.
The suppliers enhance our product line annually, delivering superior solutions to address on-site issues. Regular policy reviews ensure everyone stays informed.
Guidance on pricing and installation times
We offer guidance on pricing strategies for newcomers to ensure accurate pricing.
Required Tools
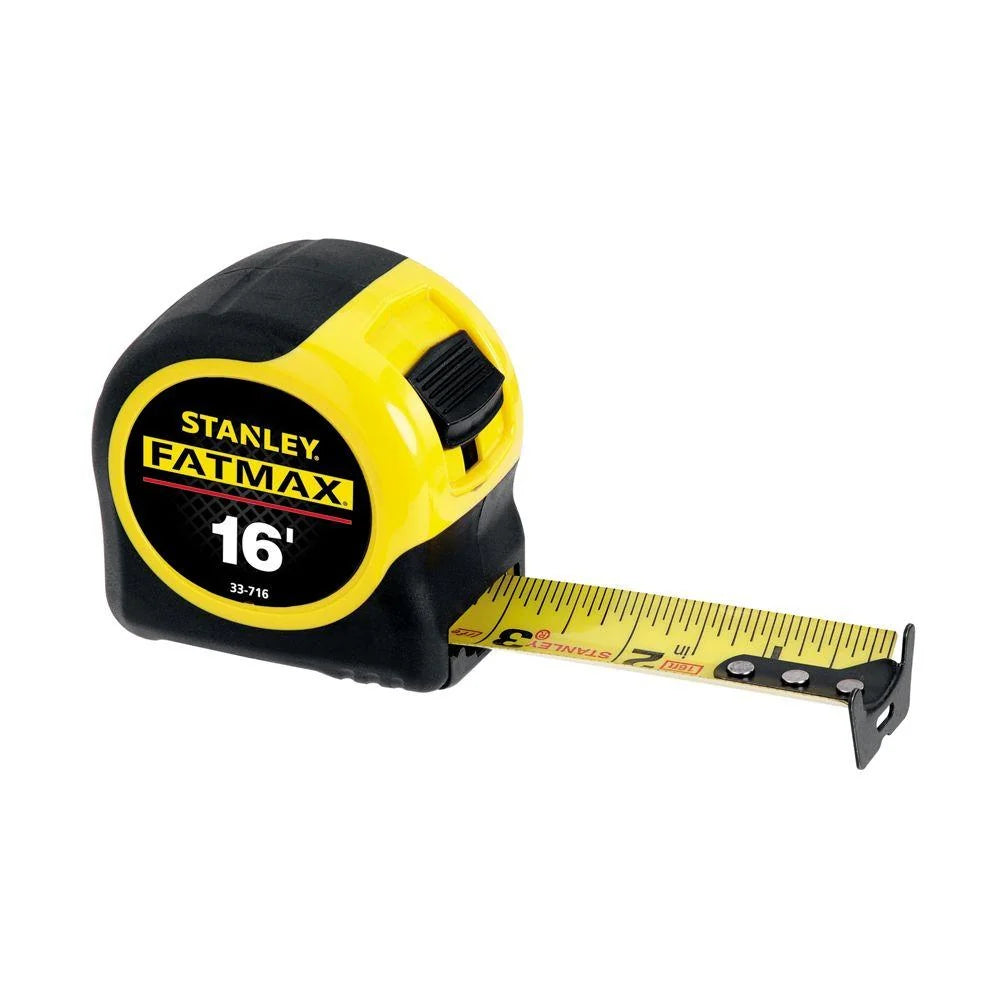
Tape measure
Measure distances, check panel spacing, ensure alignment etc
A good heavy-duty tape with clear markings helps accuracy.
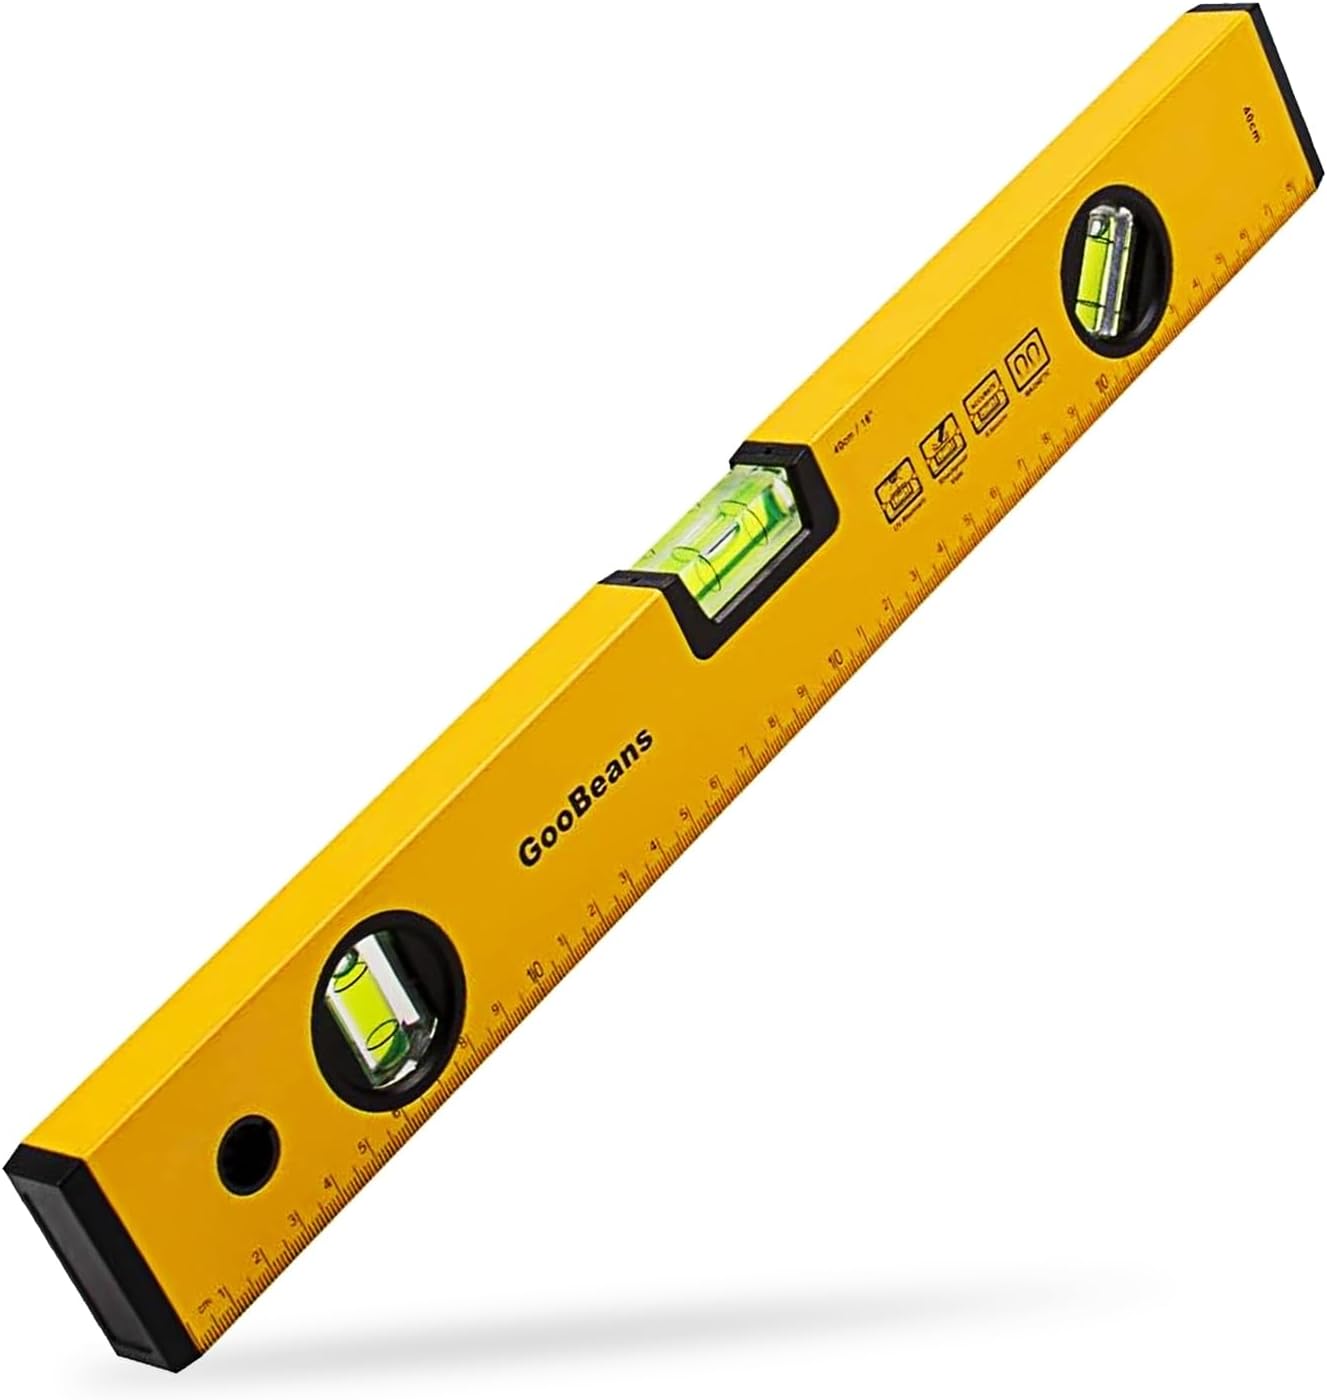
Level
Utilized for guaranteeing leveled profiles correctly.

Electric screwdriver / impact driver / drill
To drive screws, bolts, fixings; to pre-drill if necessary.
Makes repetitive work faster and more consistent (vs manual screw-drivers).
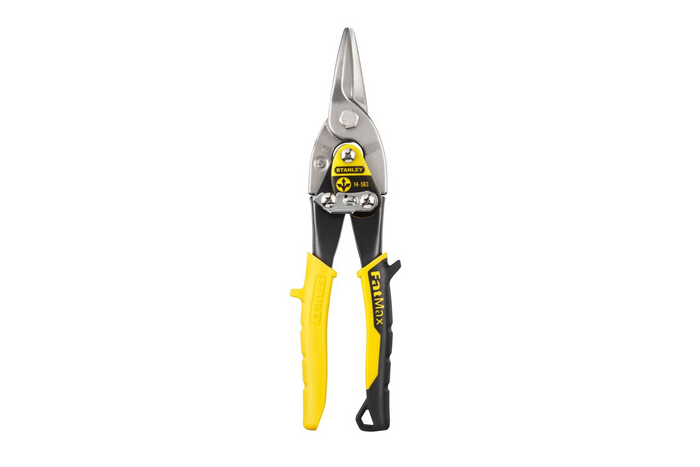
Metal shears
Used to cut fence panel components to adjust size difference.
(Caution: Avoid using heat-generating tools such as angle grinders for cutting, as it may harm the protective coating and void the Warranty.)

Rivet Gun
Used to securely fix the sections that are cut and the window reveals onto the masking profiles. We recommend using a battery-powered rivet tool for easier installation. Using a manual tool will prolong the task. The rivet gun must be compatible with 40 mm rivets.
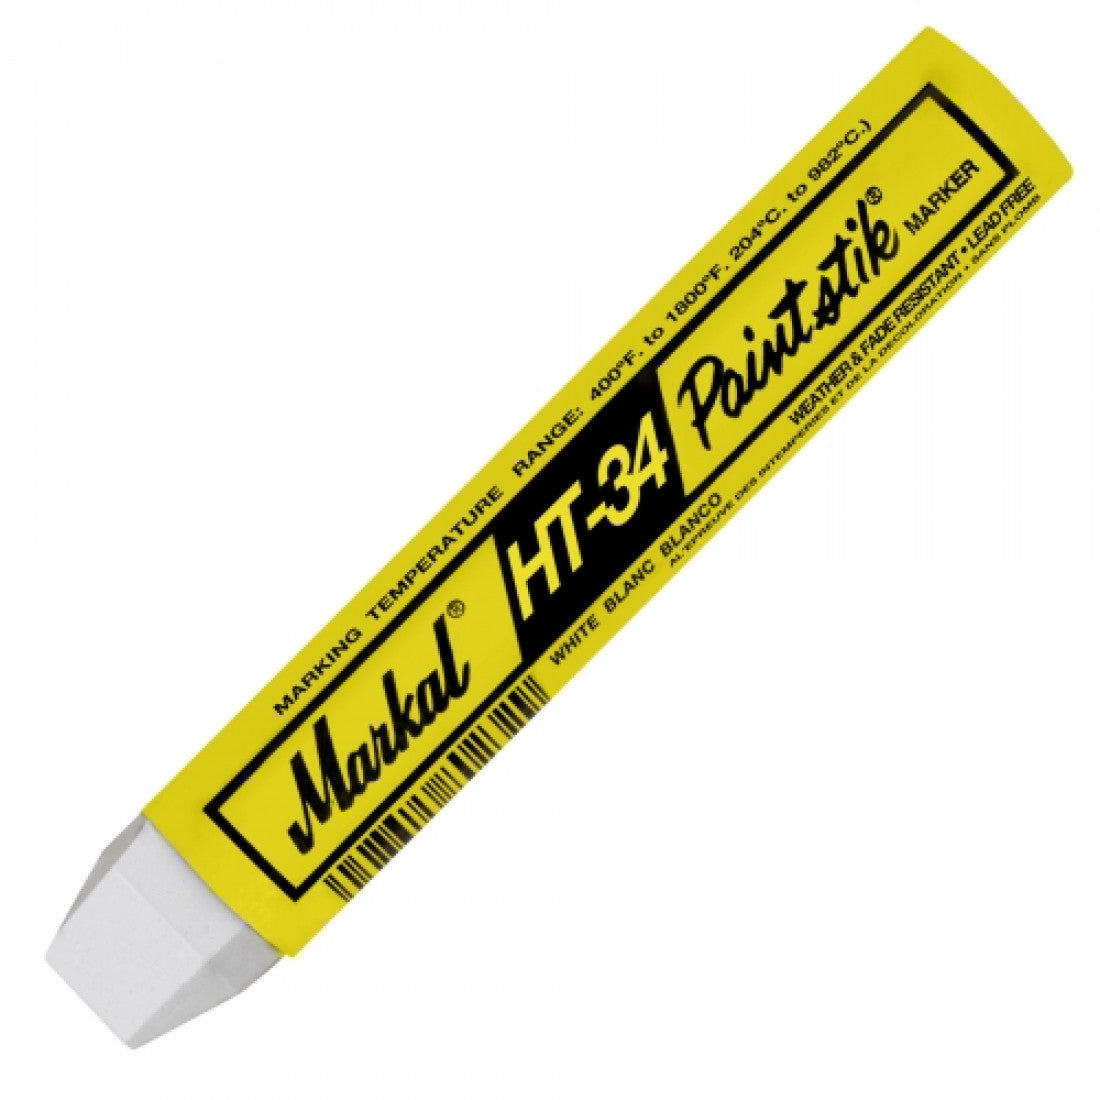
Marker tools
Properly marking element positions improves installation efficiency and minimises errors.

4.5mm Steel Drill Bit
The 4.5 mm drill bit facilitates precise hole creation in profiles unsuitable for traditional systems.

Laser Level(Recommended)
Use the laser level to set up the base of our cladding/level your starter profile.

Metal Niblers(Recommended)
Use nibblers to cut the materials when required. This electric cutting tool provides a smooth and precise finish.
Warning: Do not use a flex or grinder to cut the materials, as this will damage the protective surface of the cladding.
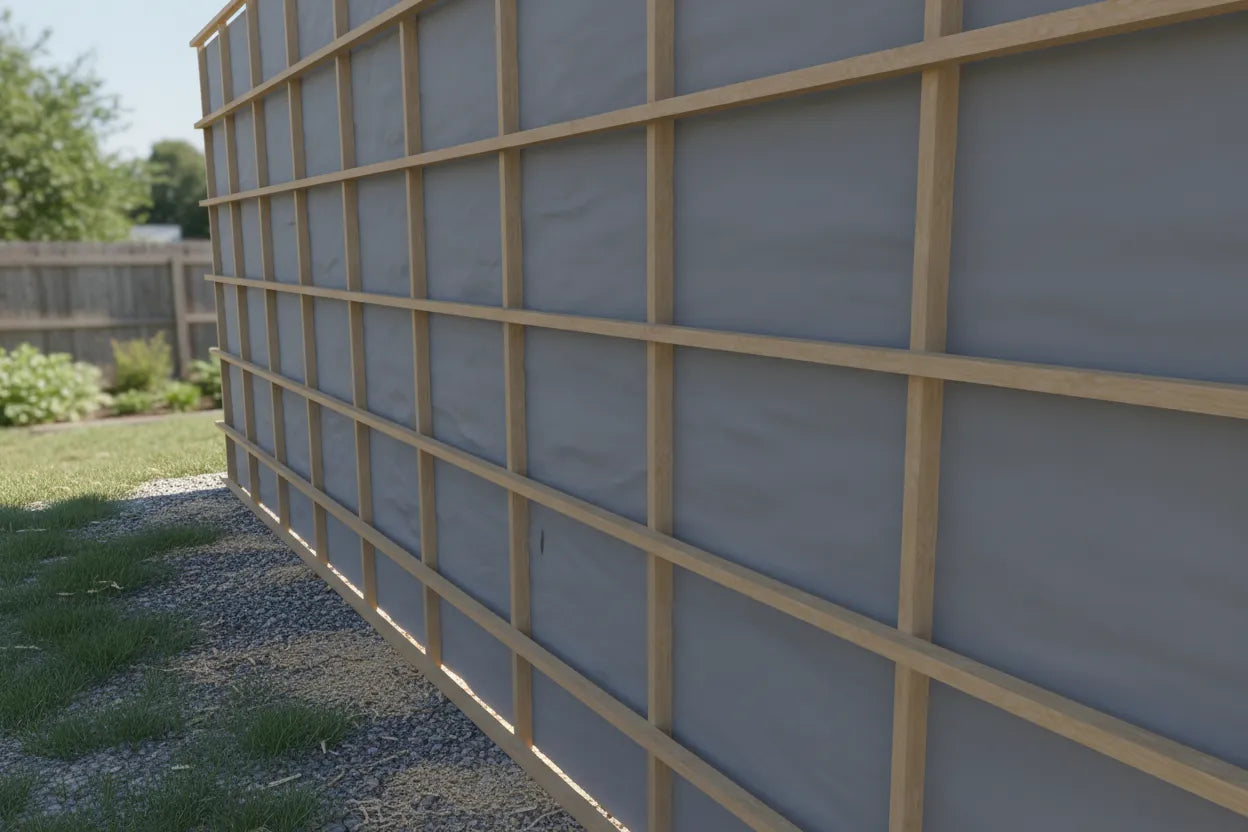
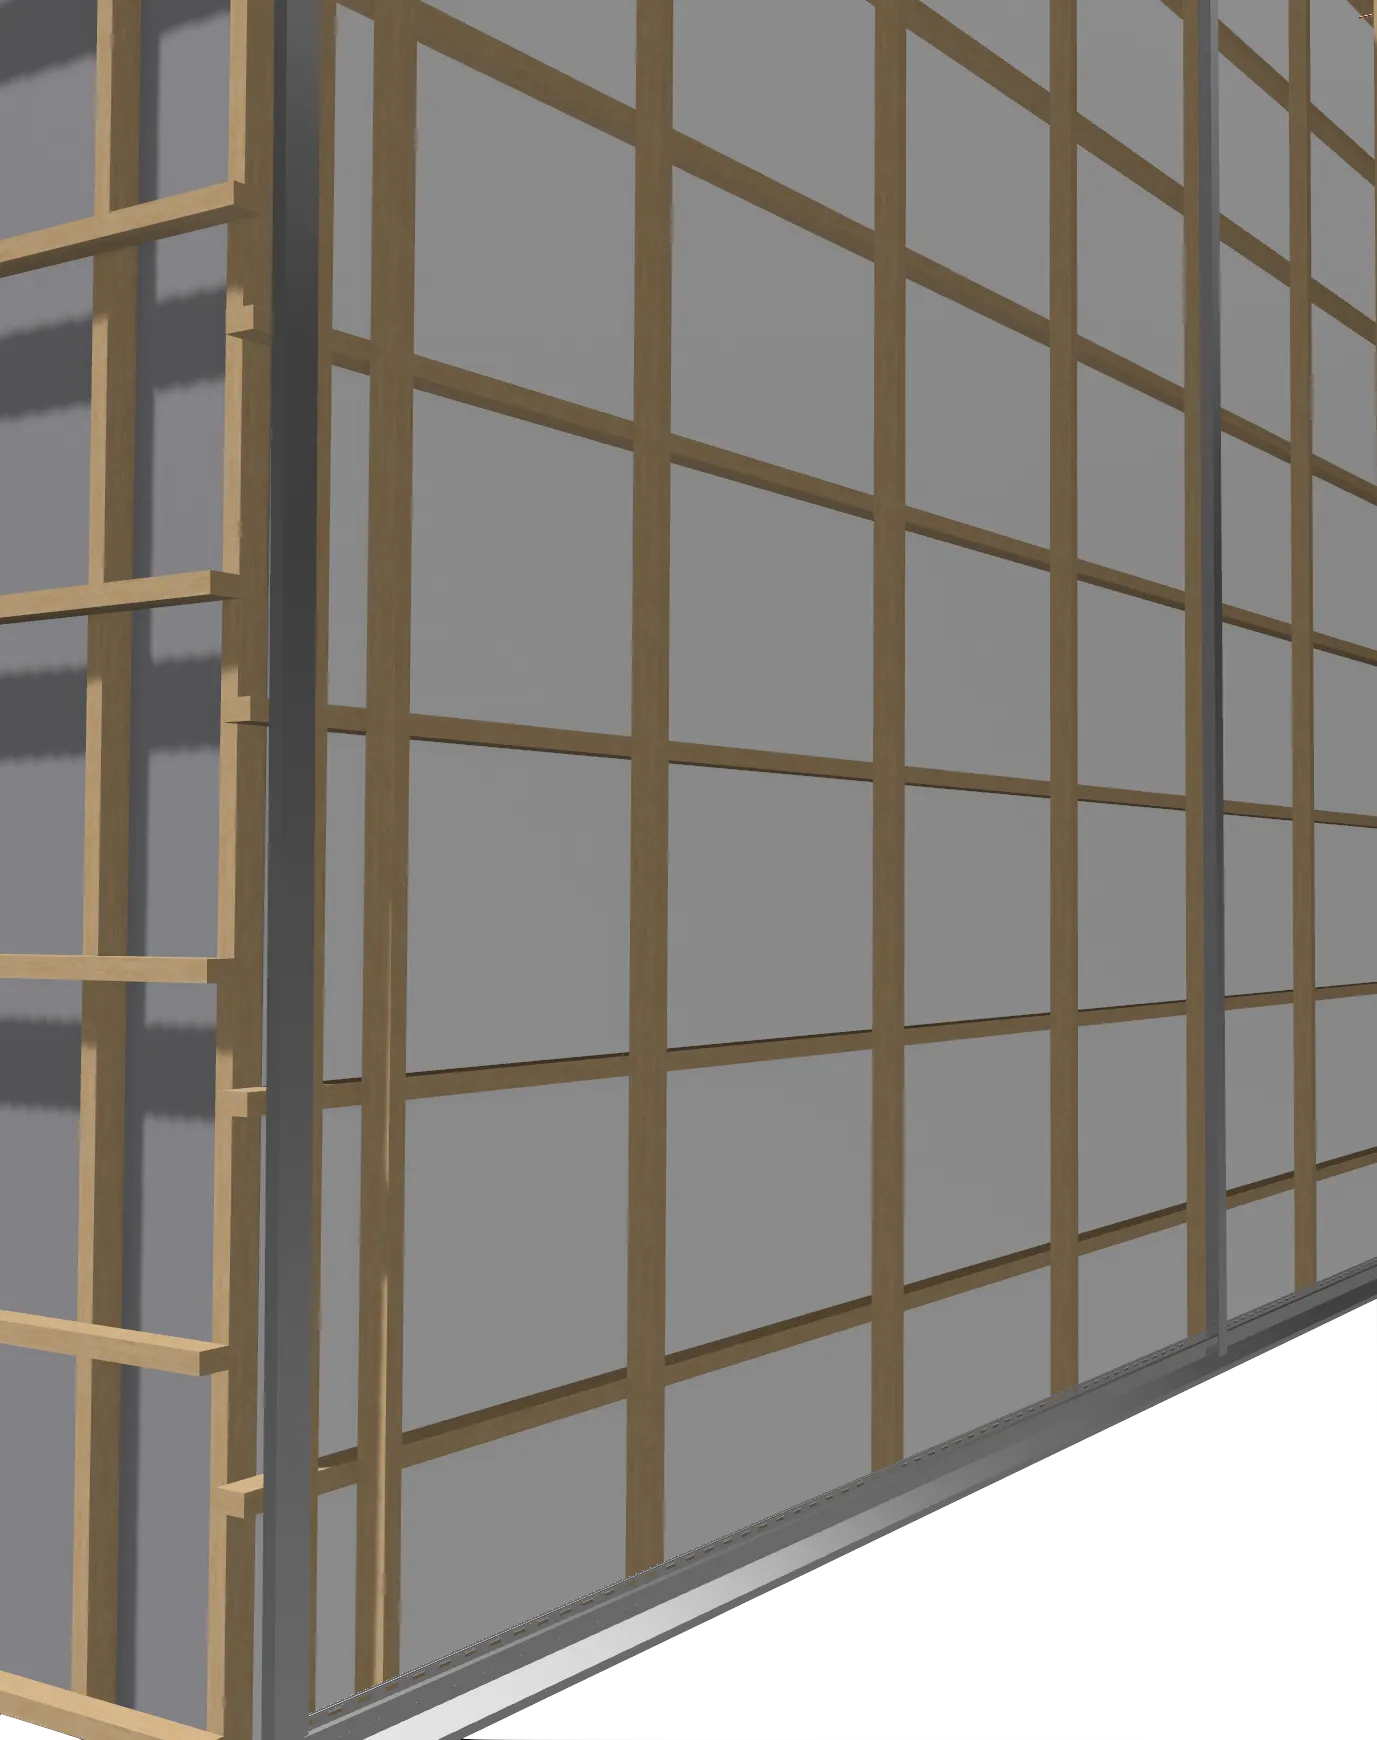
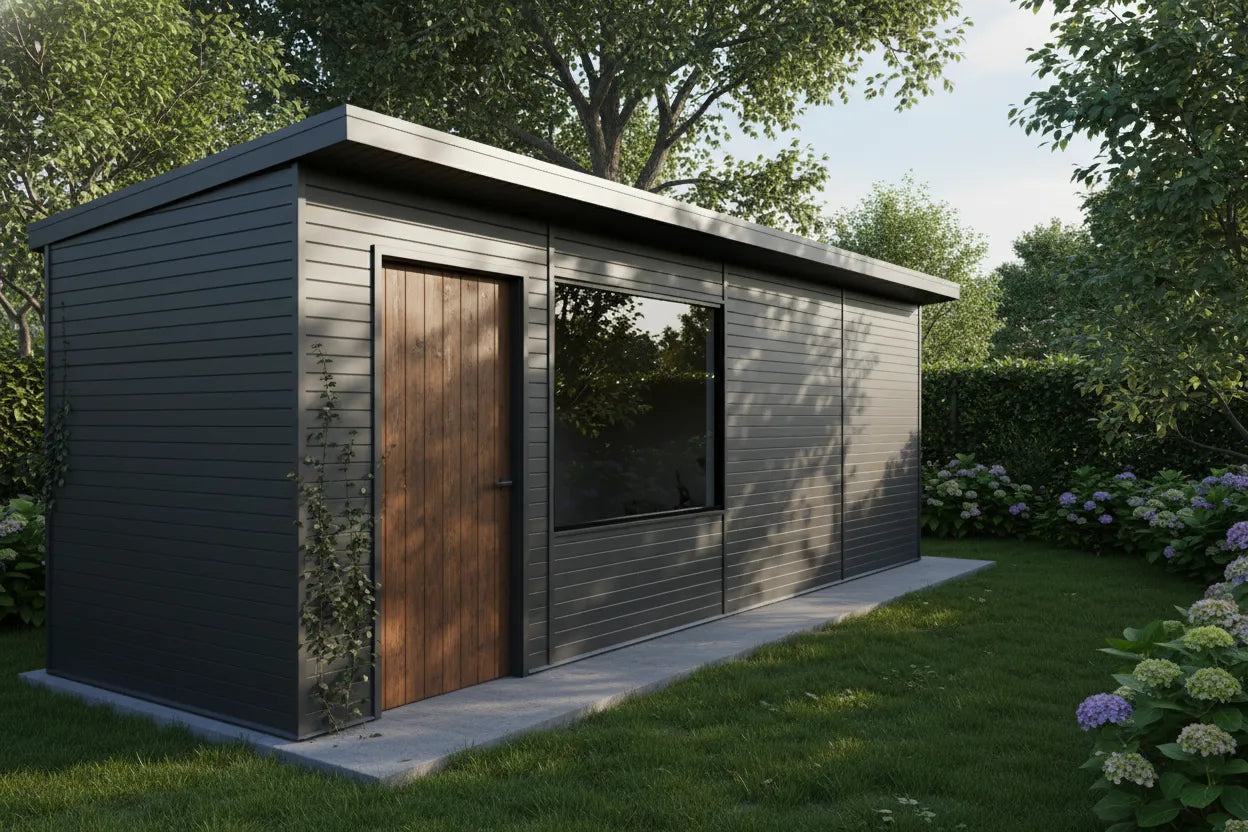
Cladding Components
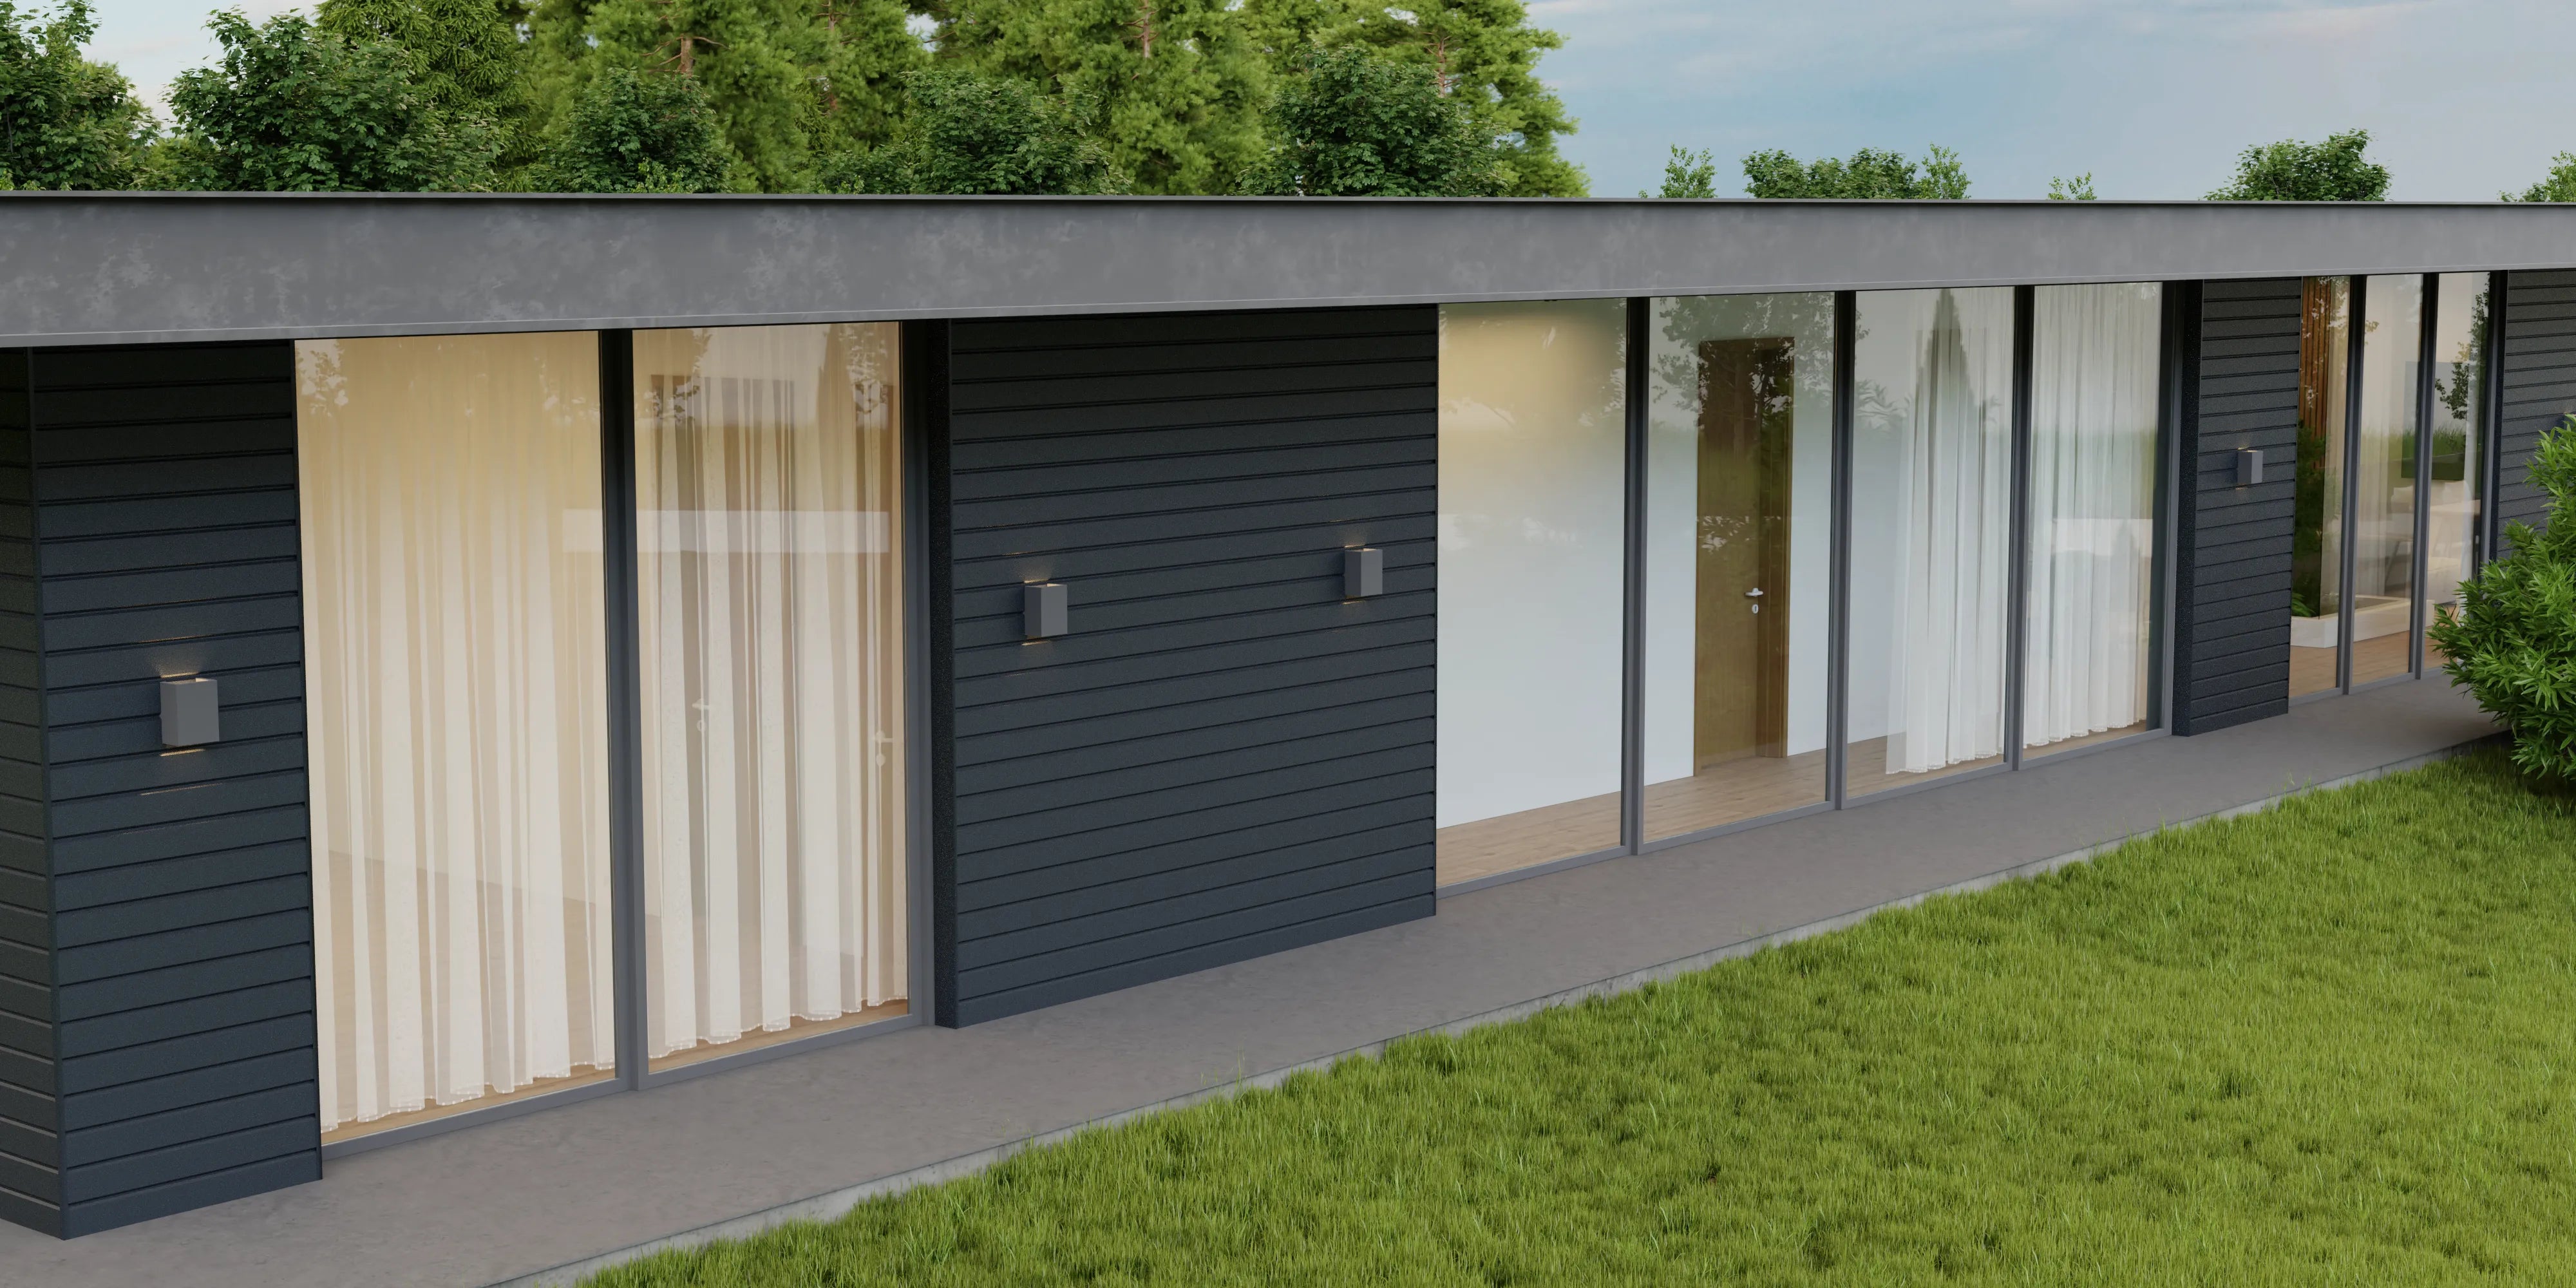
Cladding Panel
Covers the surface of the façade.
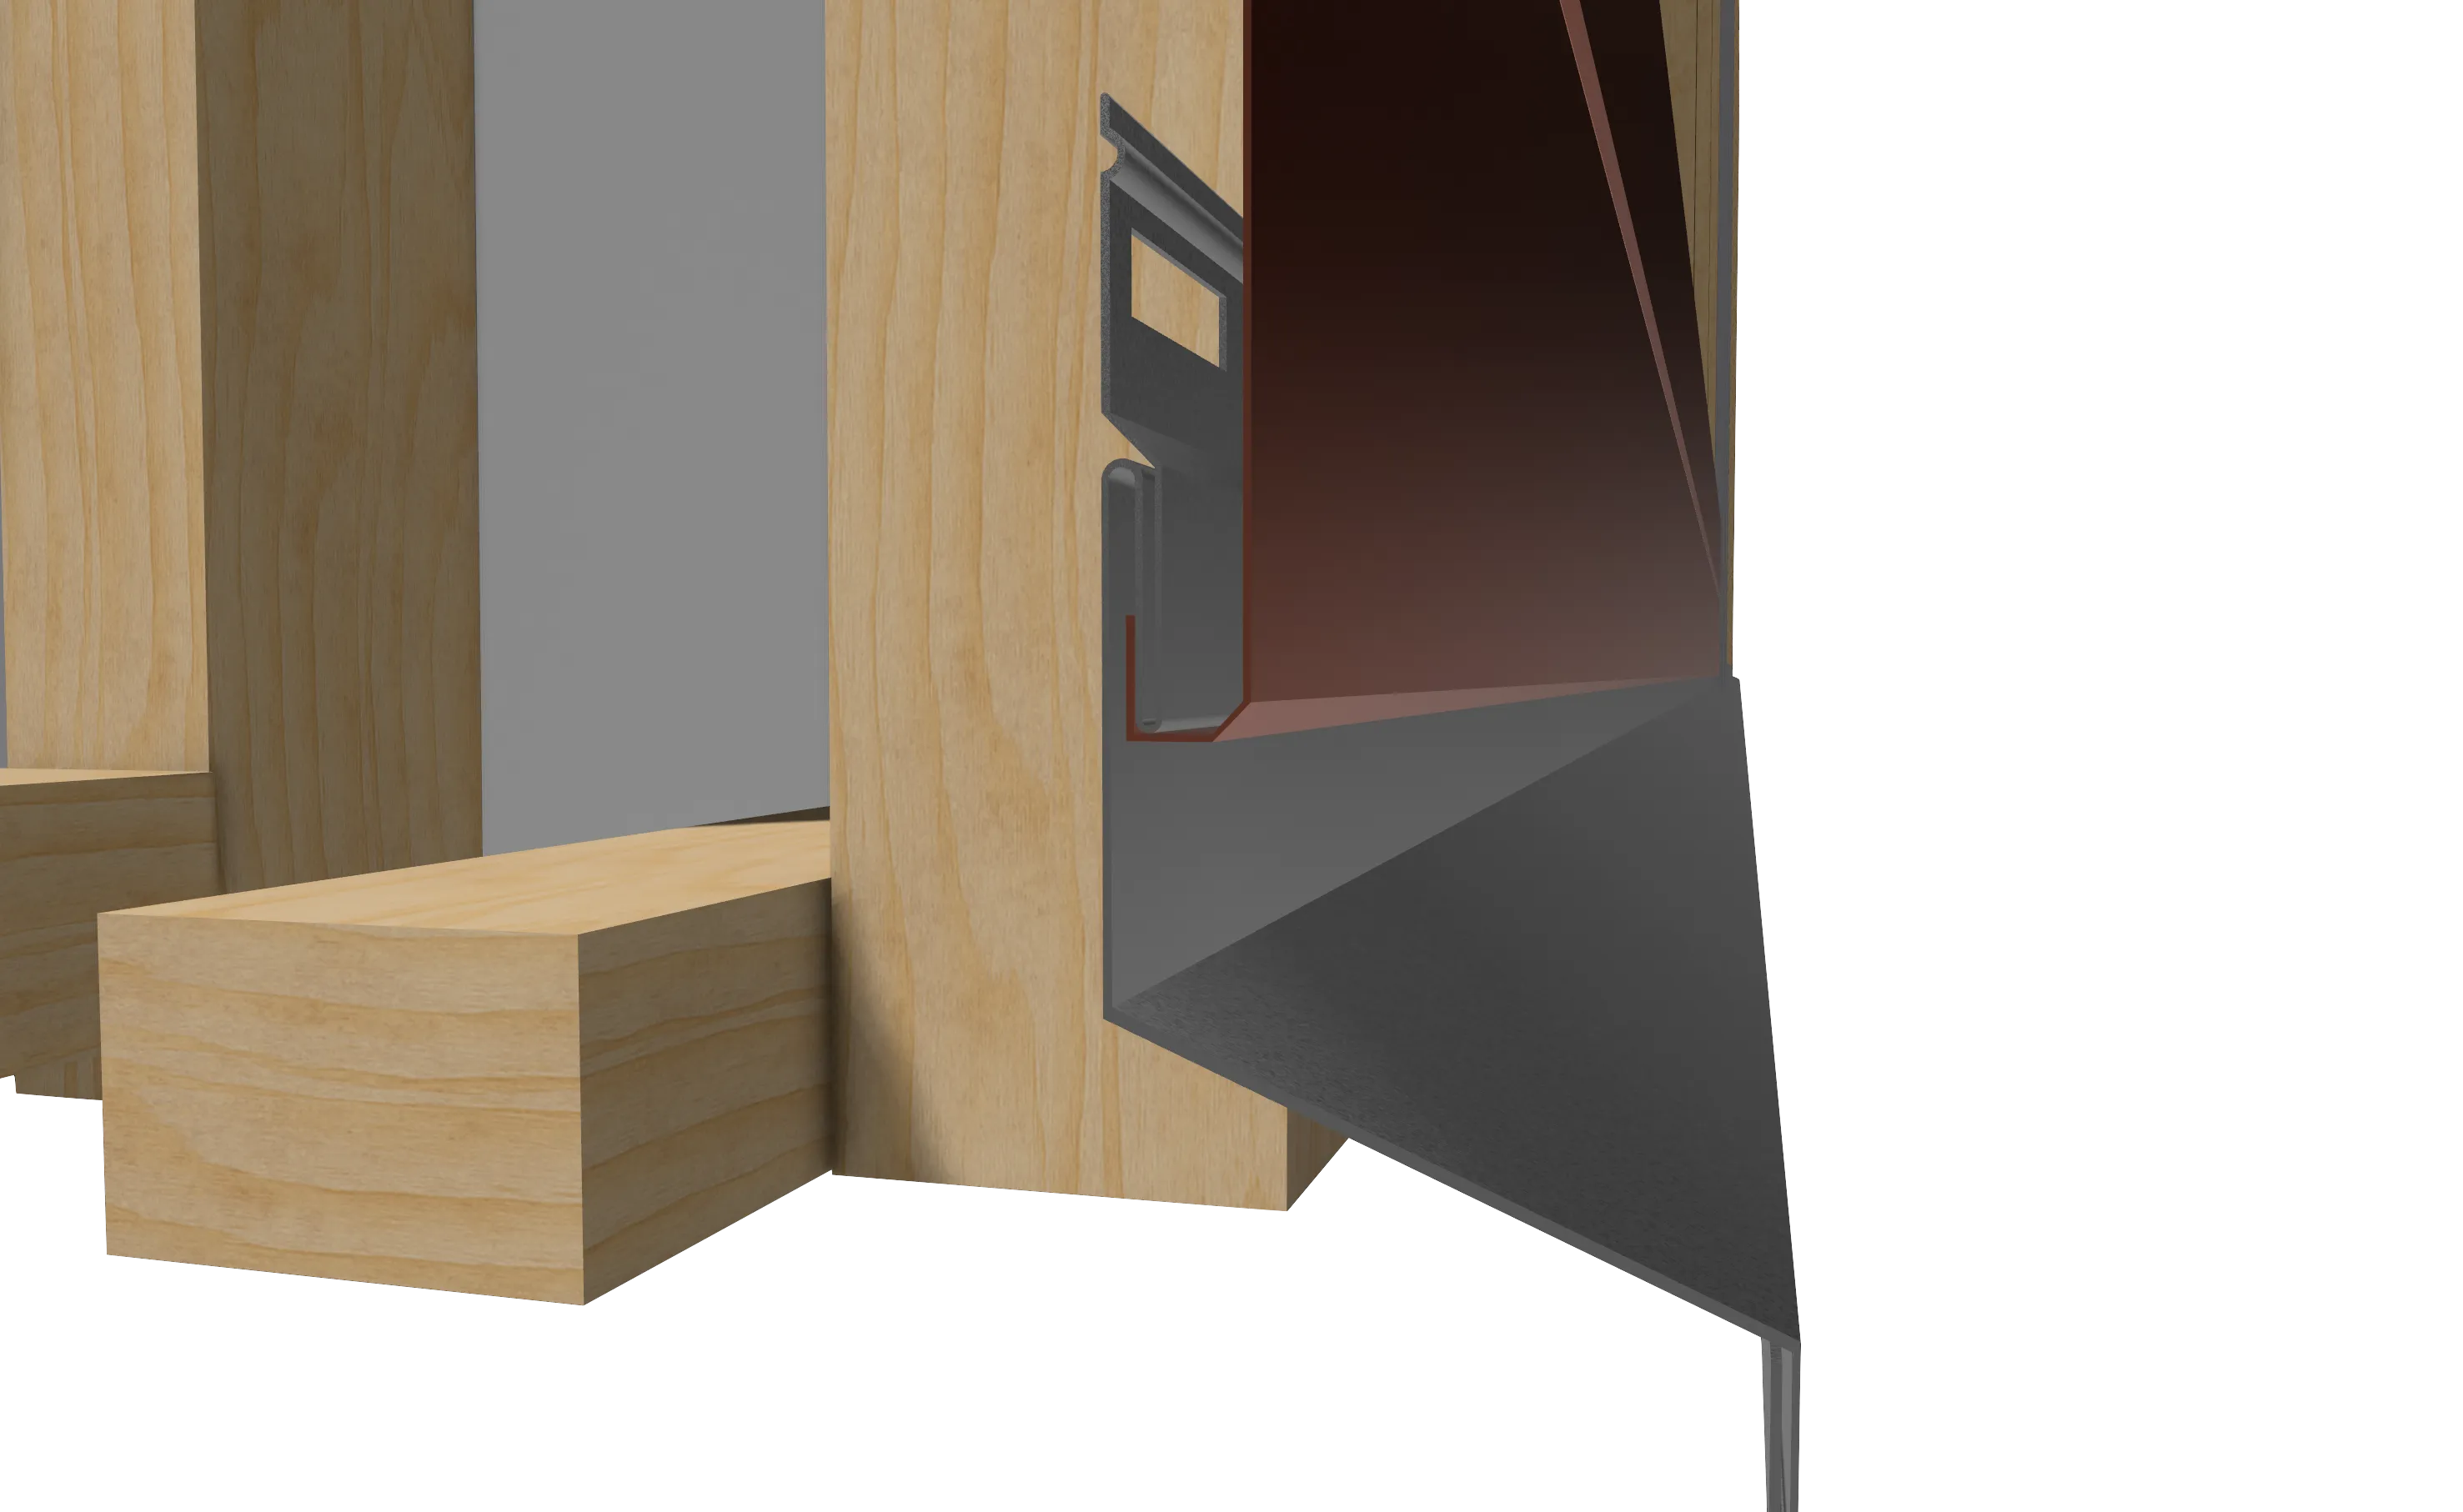
Secure the panel onto the starter profile by engaging the specially designed lip. Continue installing each subsequent panel in the same manner, working your way upwards until you reach the top of the façade.
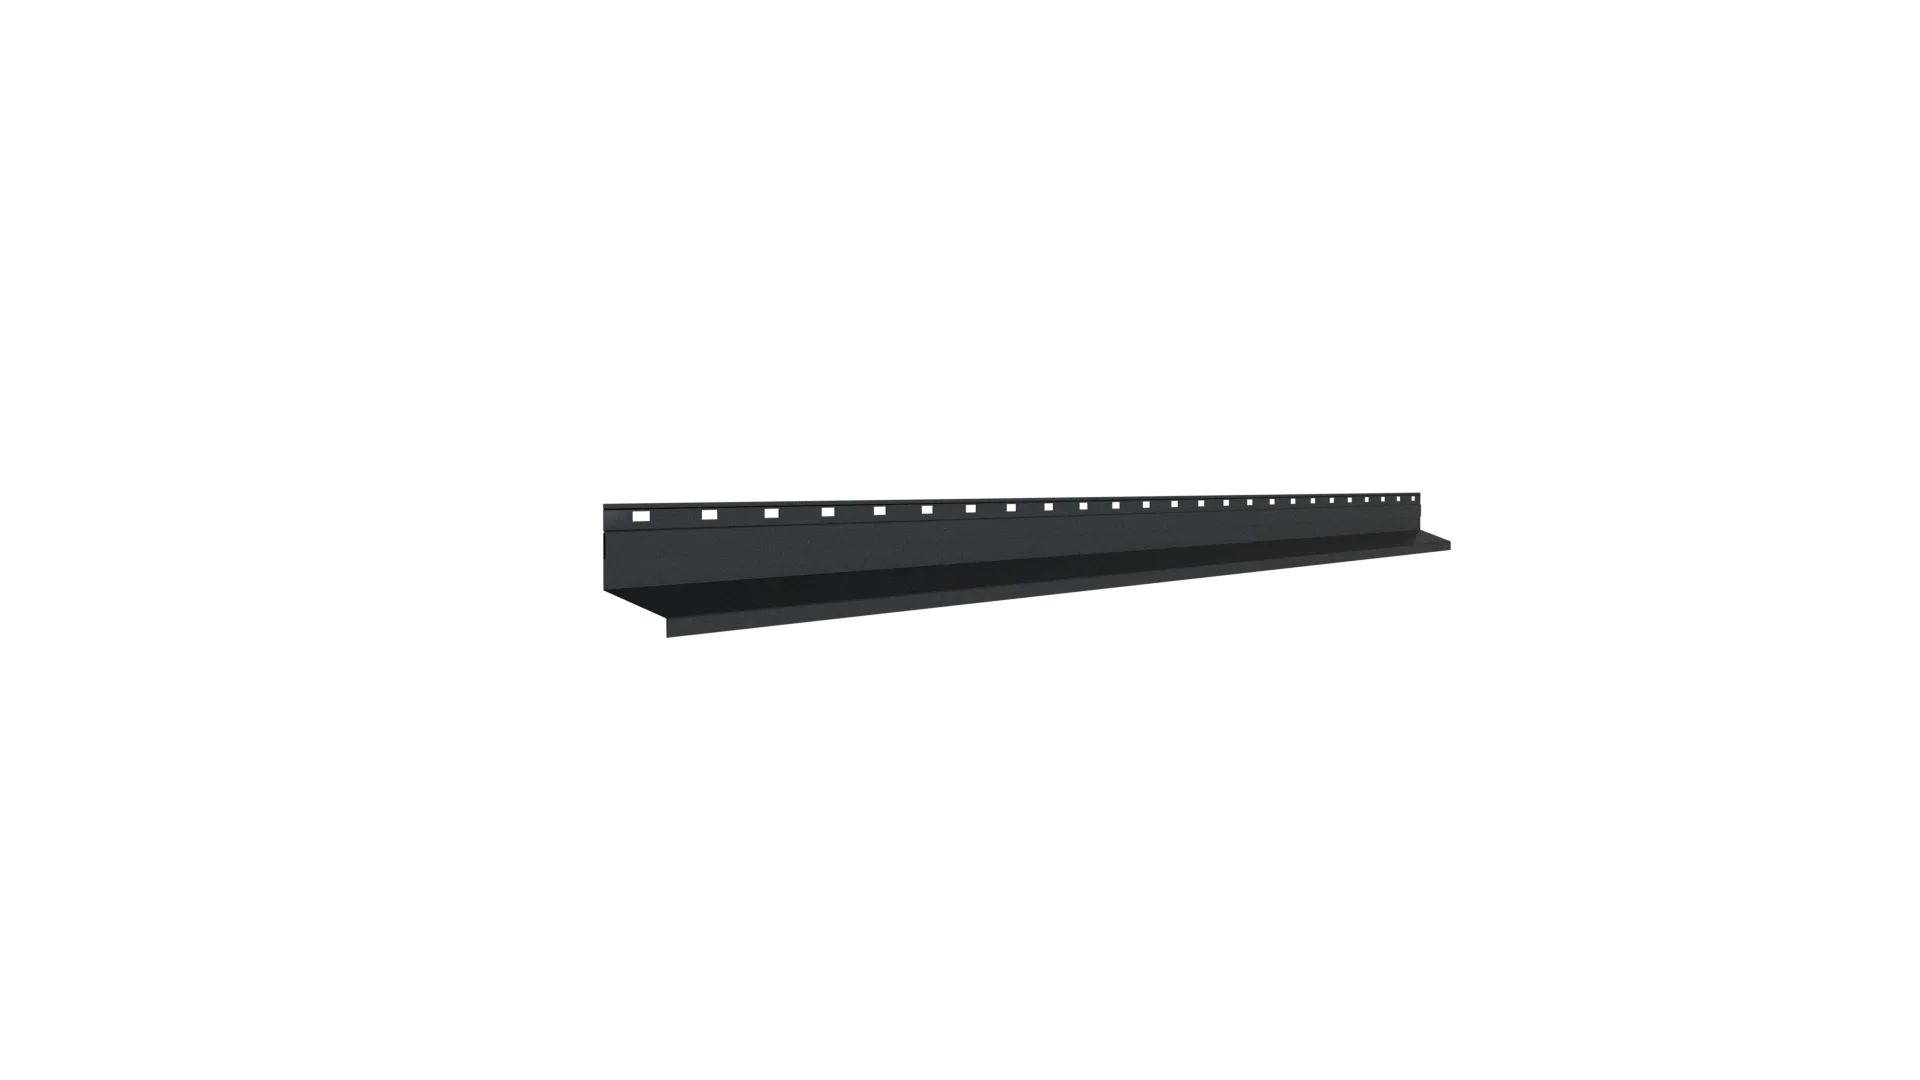
Starter Profile
Forms the base of the cladding system.
It provides the initial fixing point for the panels and helps direct water away from the structure.
The starter profile can be positioned vertically for vertical cladding installation.
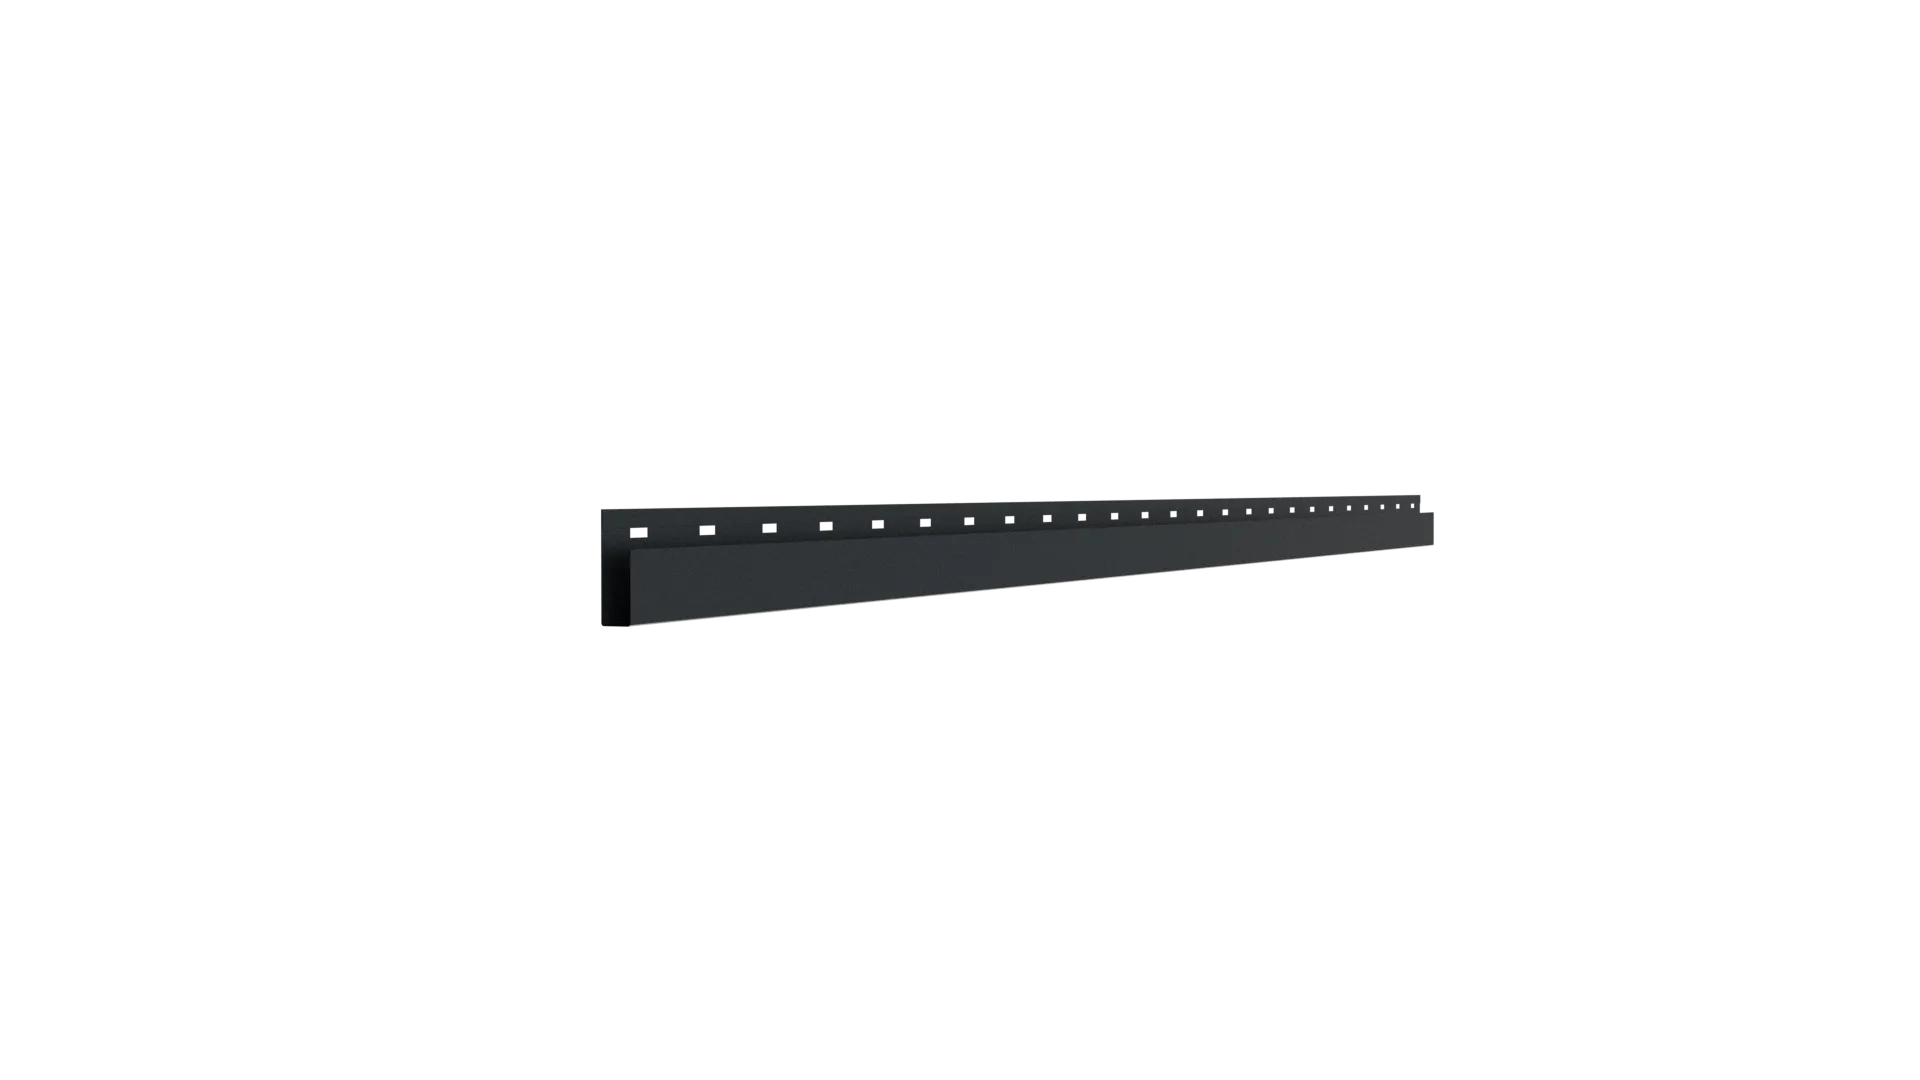
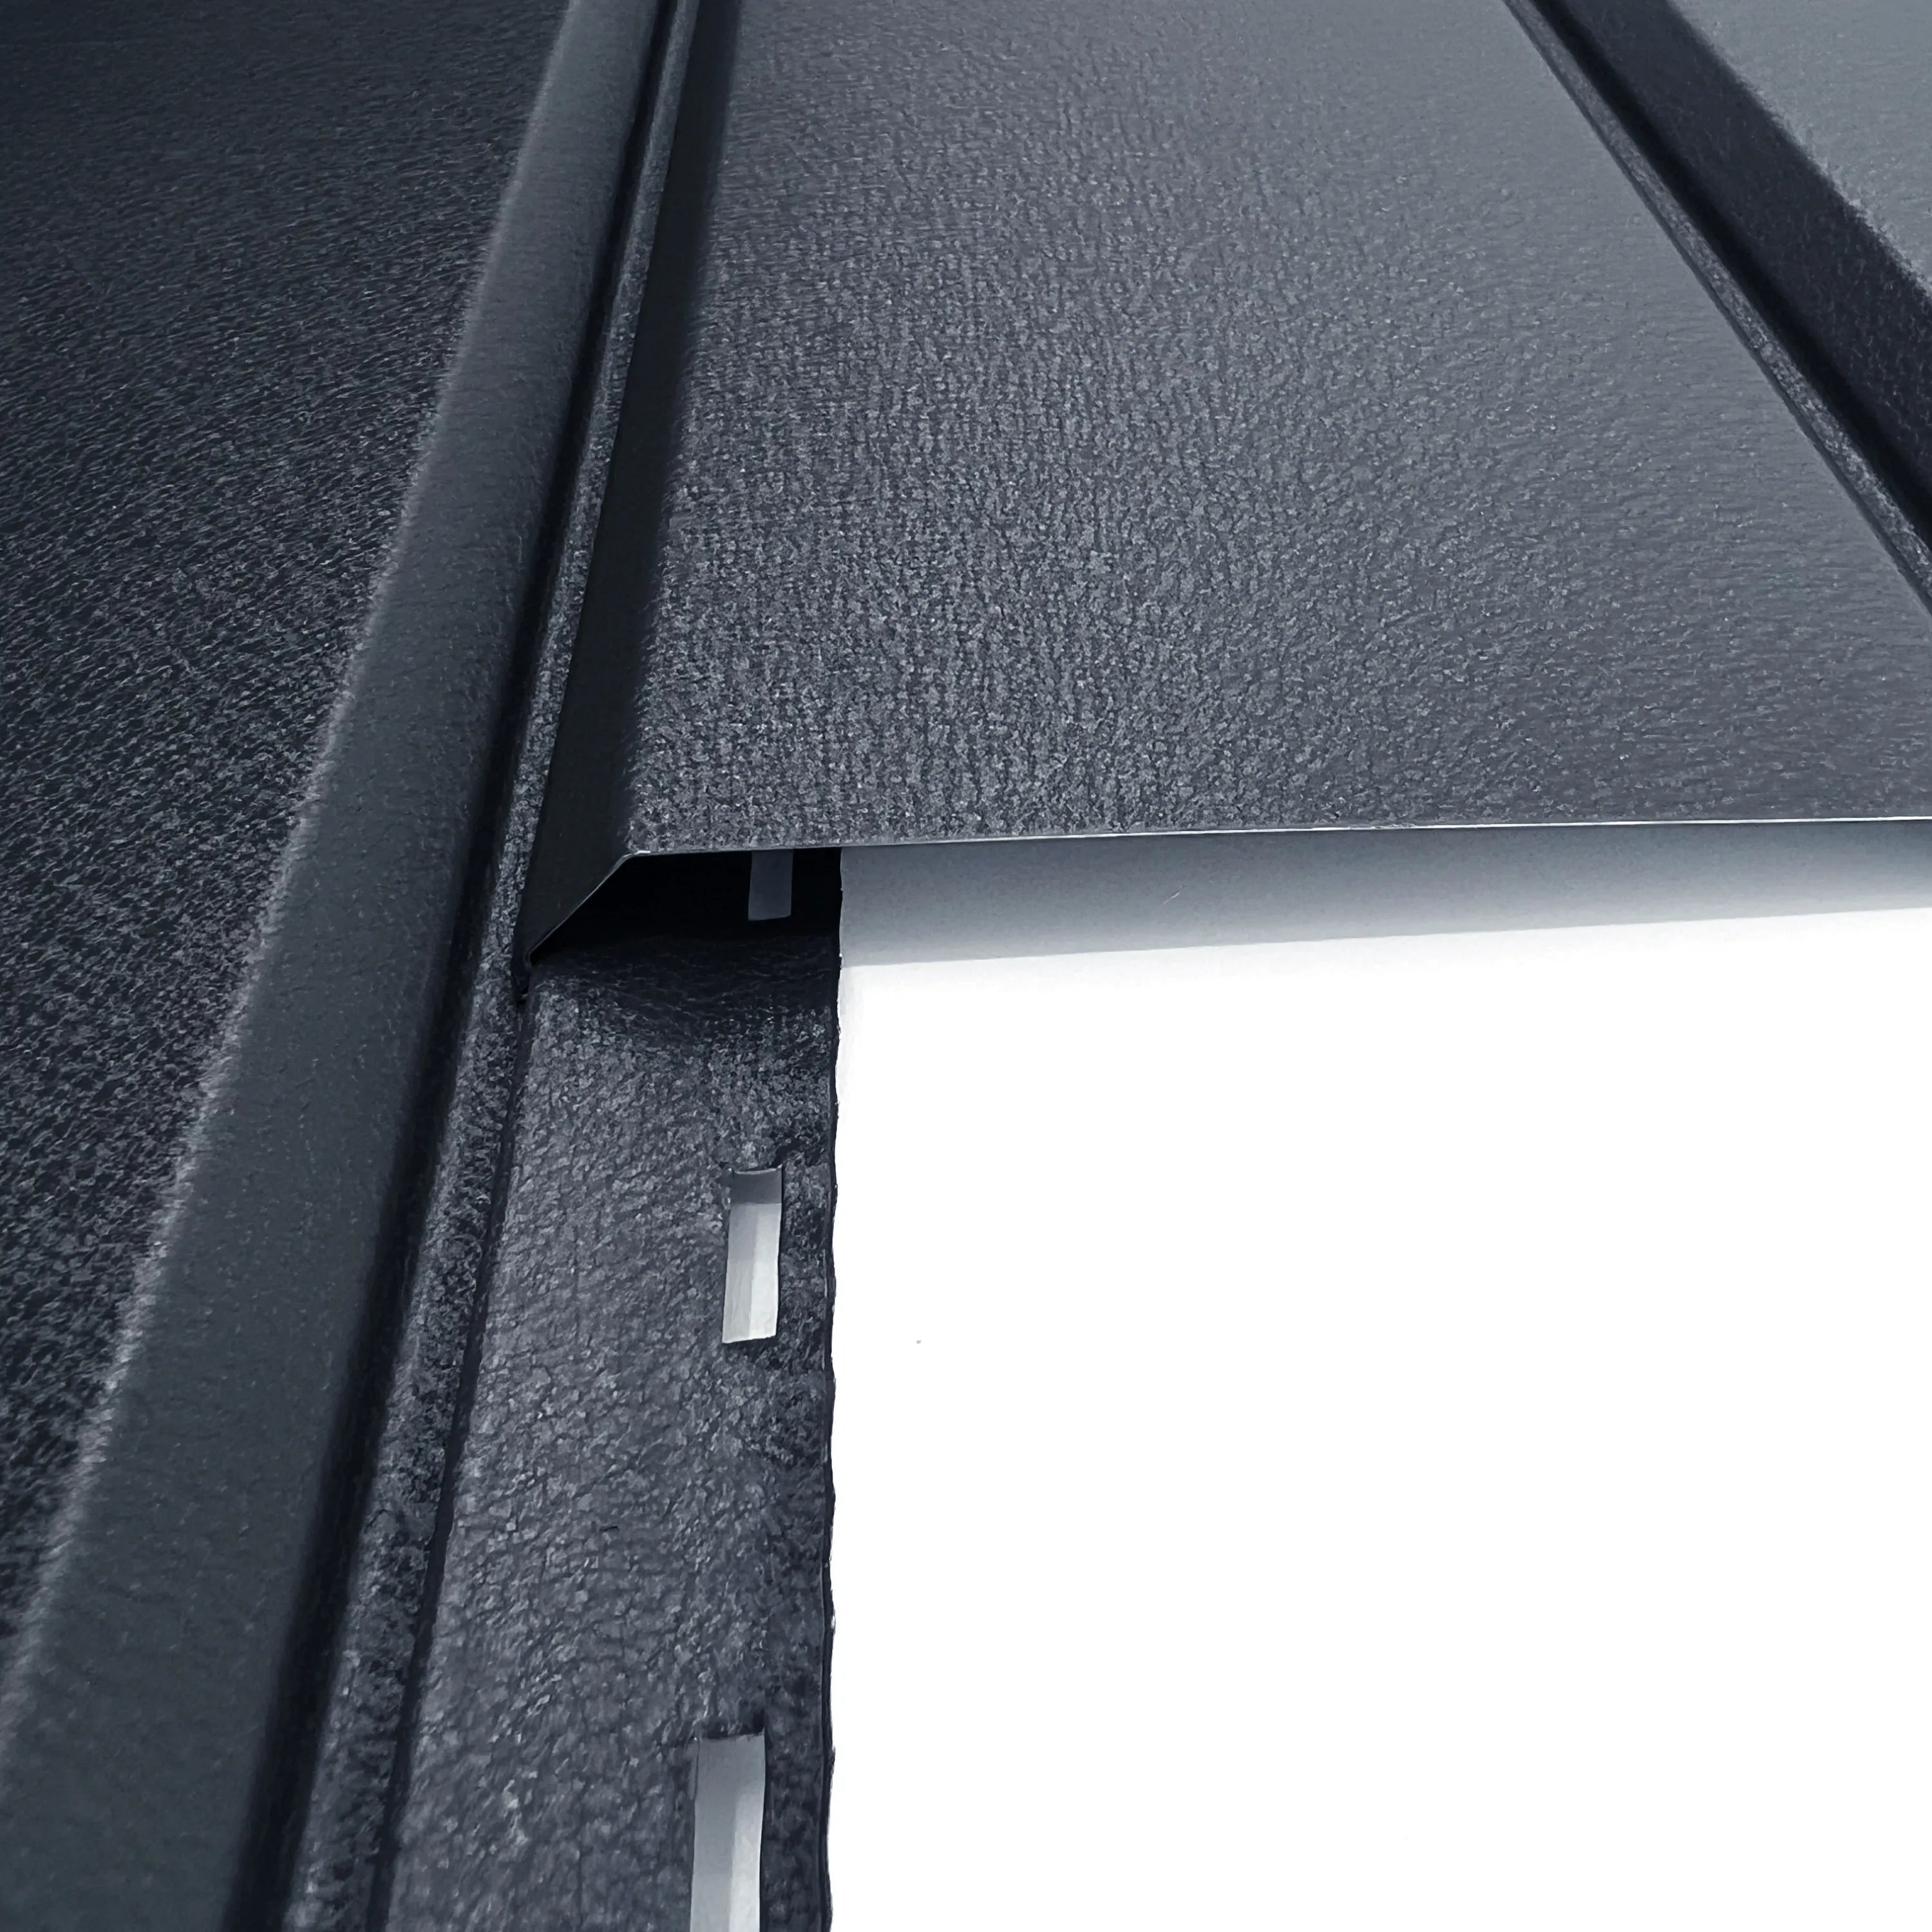
End/Masking Profile
Creates a clean, finished edge on the cladding façade.
It neatly covers the exposed ends of the panels and conceals any remaining gaps, ensuring a smooth and professional appearance while also helping to protect the cladding system from moisture and debris.
Installation steps
Step 1
Plan
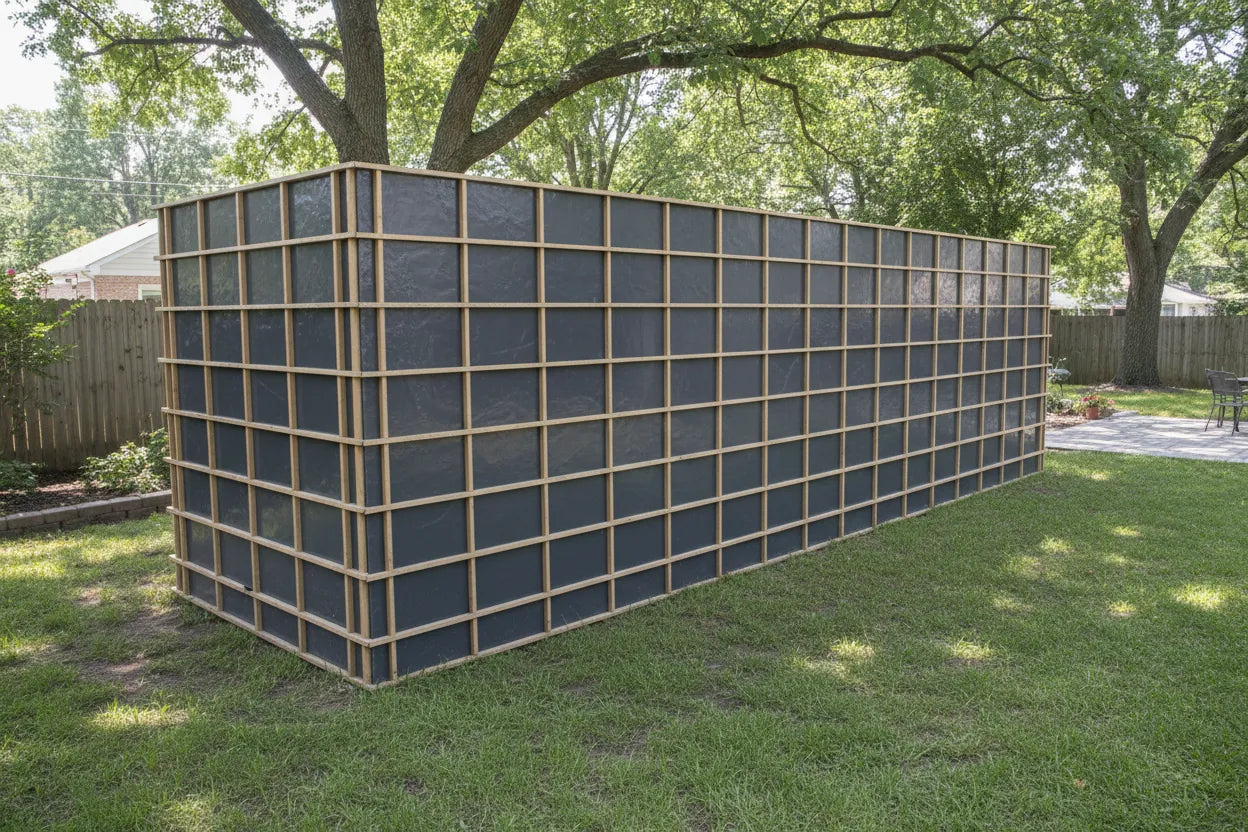
Begin by determining the orientation of your cladding installation, whether horizontal or vertical. Assess the full height and width of the area to be covered, and confirm whether the cladding will reach the edges of the building or require finishing profiles. Measure the façade carefully to calculate how many panels, profiles, and sections will be needed. Proper planning at this stage ensures accurate material quantities and a smooth installation process.
Step 2
Surface Preparation
Ensure that the substrate is clean, level, and structurally sound before installation begins. Verify that all work complies with applicable building regulations and standards.
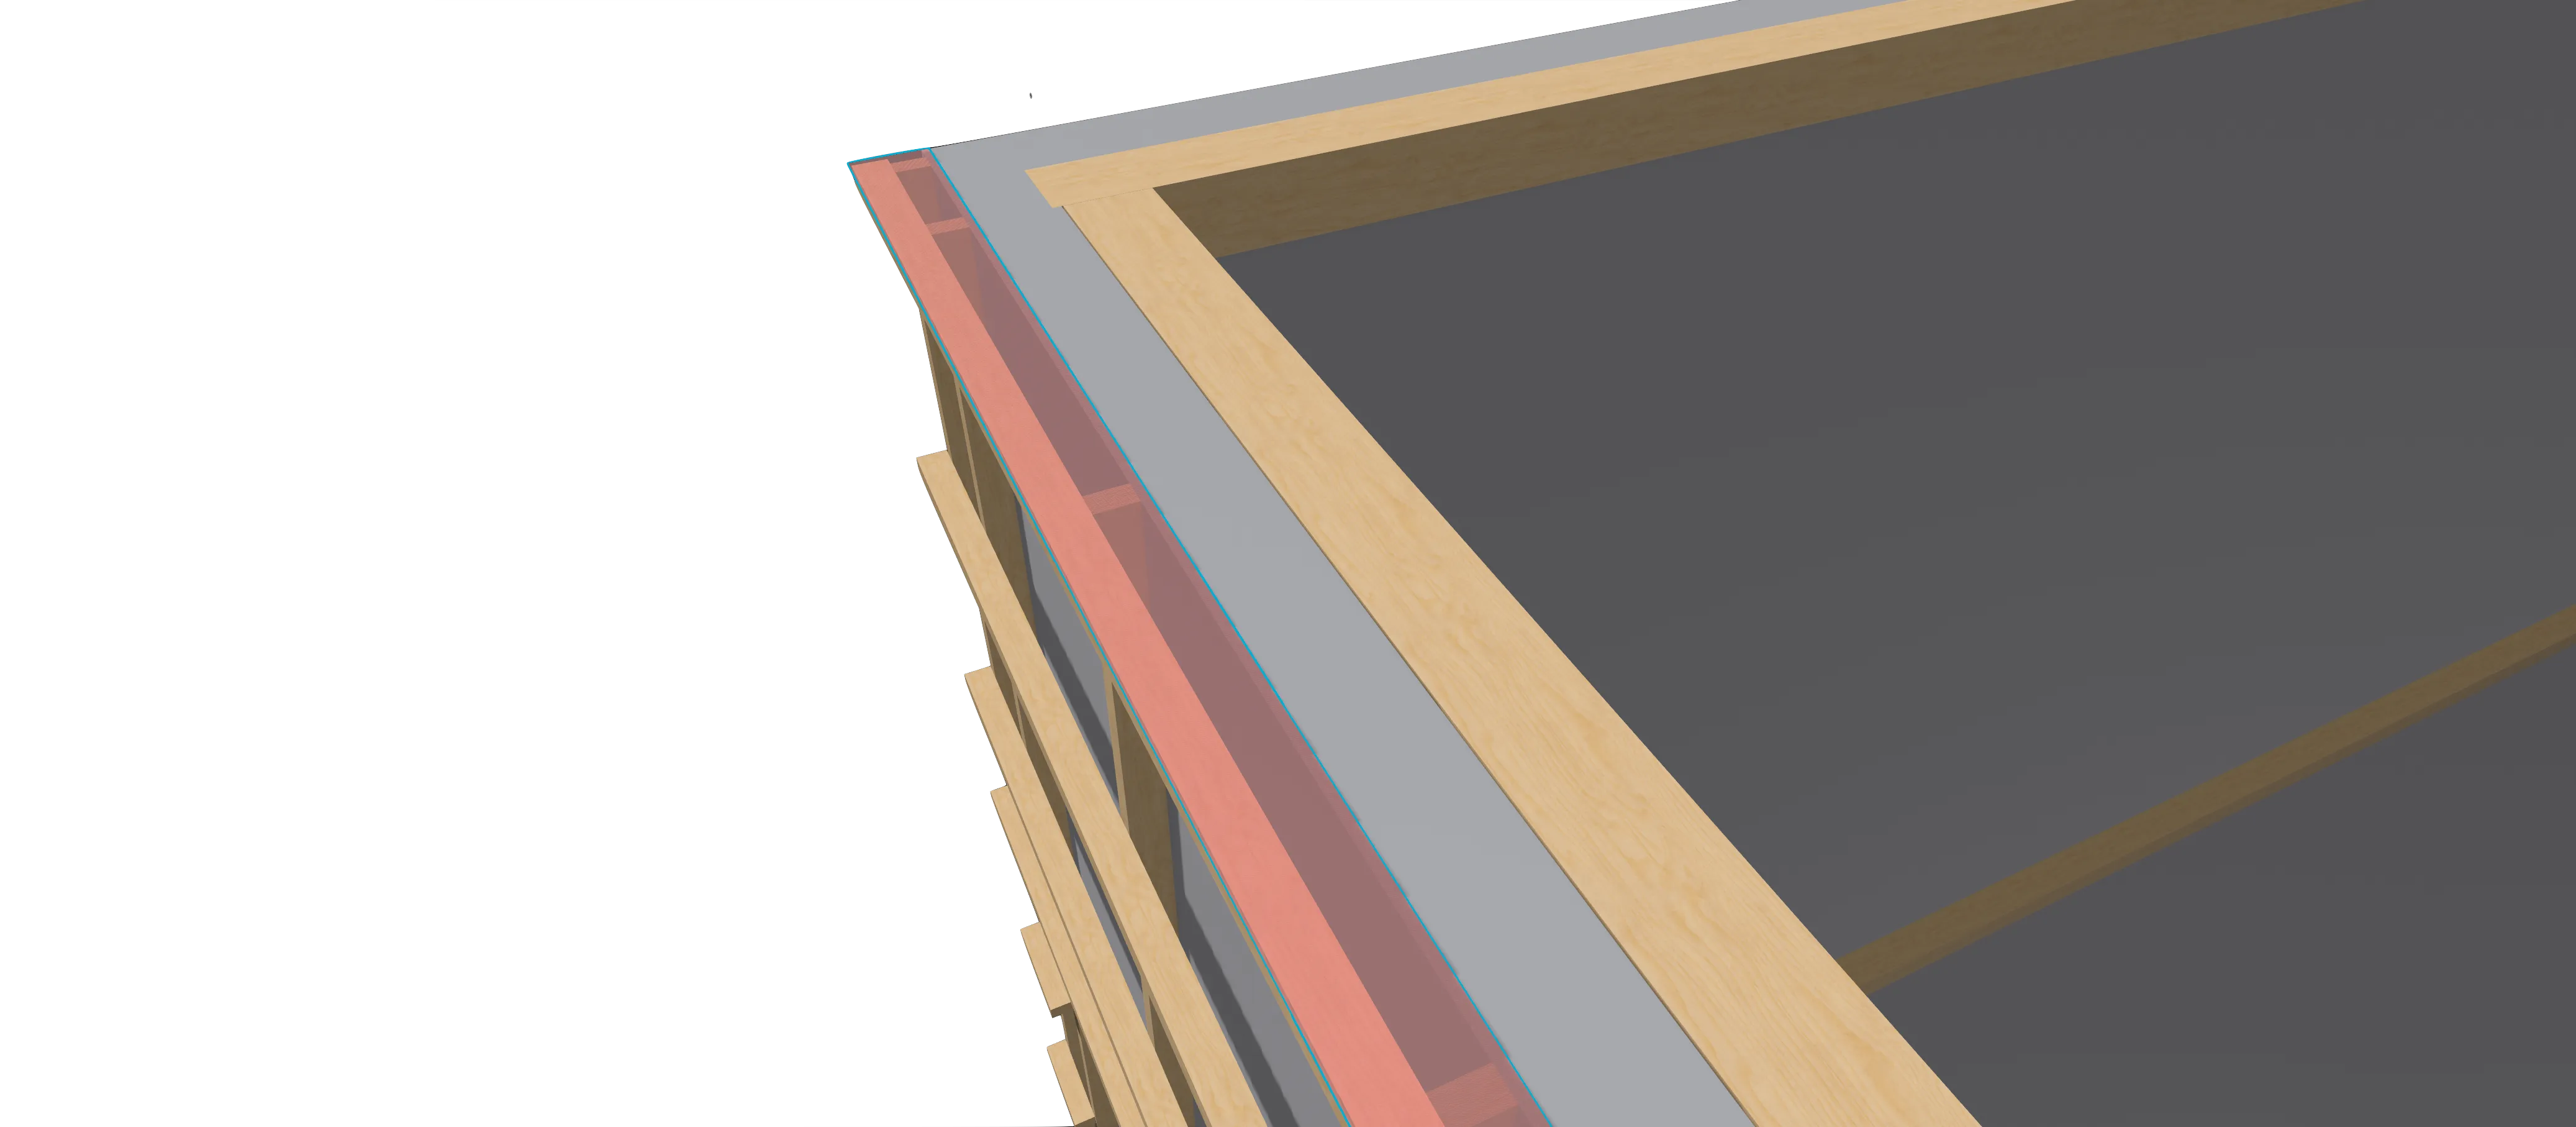
For optimal performance, we recommend installing a suitable framing system to create a stable fixing structure for the cladding panels. A vapour barrier should also be applied to help prevent moisture penetration and protect the underlying structure.
Step 3
Install ventilation mesh
Attach wire mesh to all ventilation openings created for moisture escape. This mesh is essential for maintaining a healthy façade system, as it allows air to circulate while preventing rodents, insects, and other pests from entering or nesting between the cladding and the building structure.
Ensuring these openings are properly protected helps preserve ventilation performance and supports the long-term integrity of the cladding installation.
Step 4
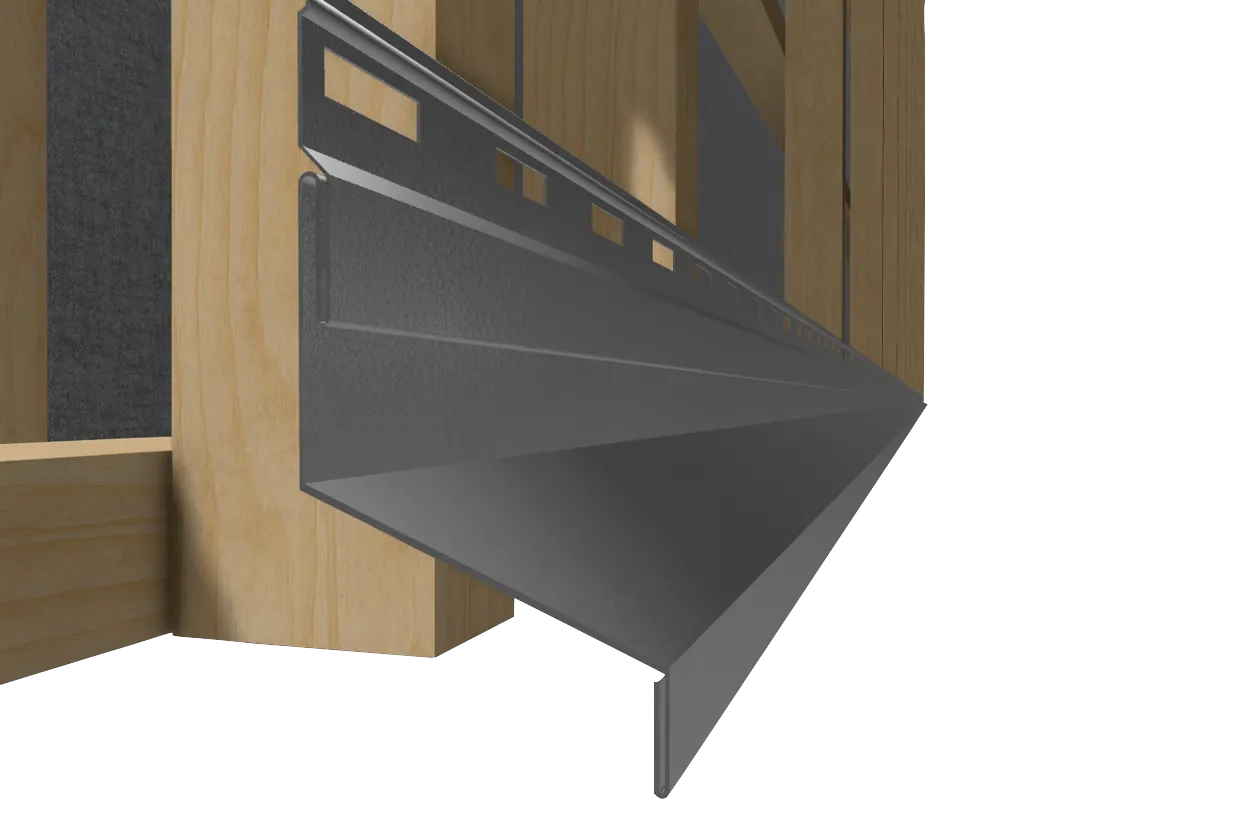
Install the starter profile
Position the starter profile along the bottom edge of the façade and ensure it is perfectly level before fixing. Secure the profile at intervals of approximately 400 mm to create a stable and accurate base for the first cladding panel.
Note: When fixing the starter profile, the screws must be placed in the centre of the pre-formed slots. This allows for proper expansion and contraction of the material and helps maintain the long-term performance of the cladding system.
Step 5
Install the masking profiles
Before positioning the cladding panels, install the masking profiles that will frame and conceal the panel edges. Since each cladding panel has a length of 2500 mm, the masking profiles should be installed at a spacing of 2530 mm. This provides a 15 mm allowance on each side of the panel, ensuring it can be easily slotted into place and has sufficient room for thermal expansion.
Correct spacing is essential to prevent stress on the panels and to maintain a clean, professional finish across the façade.
Step 6
Install the cladding panels
Carefully slide the cladding panel between the masking profiles, lowering it until it reaches the starter profile. Engage the bottom edge of the panel by hooking it into the specially designed lip of the starter profile. This ensures the panel sits securely and aligns properly.
Once the panel is seated, pull it slightly upward to its final position and fix it to the building’s subframe. Only the top edge of each cladding panel requires mechanical fixing, as the lower edge locks into the panel beneath it or into the starter profile.
Install each subsequent panel following the same procedure, working upwards across the façade to achieve a uniform and secure cladding finish.
Step 7
Complete the Installation to the Top of the Façade
Continue installing the cladding panels using the same procedure, working methodically upward until you reach the final row. Slide the last cladding panel into place, but do not fix it yet.
Once the panel is positioned, insert the top masking profile by sliding it into place above the panel. When both the final panel and the top masking profile are correctly aligned, fix them together to secure the top of the façade. This completes the installation and ensures a clean, professional finish.
Step 8
Repeat for All Remaining Sections
Once the first section of cladding is complete, repeat Steps 2 through 7 for each subsequent section of the façade. Ensure that every new section aligns correctly with the previous one and maintains consistent spacing, ventilation, and fixing patterns. Continue this process methodically until the entire façade is fully clad and all profiles are securely installed.
This systematic approach ensures a uniform appearance and a durable, high-quality finish across the entire building.
Step 9
Final Checks and Completed Façade
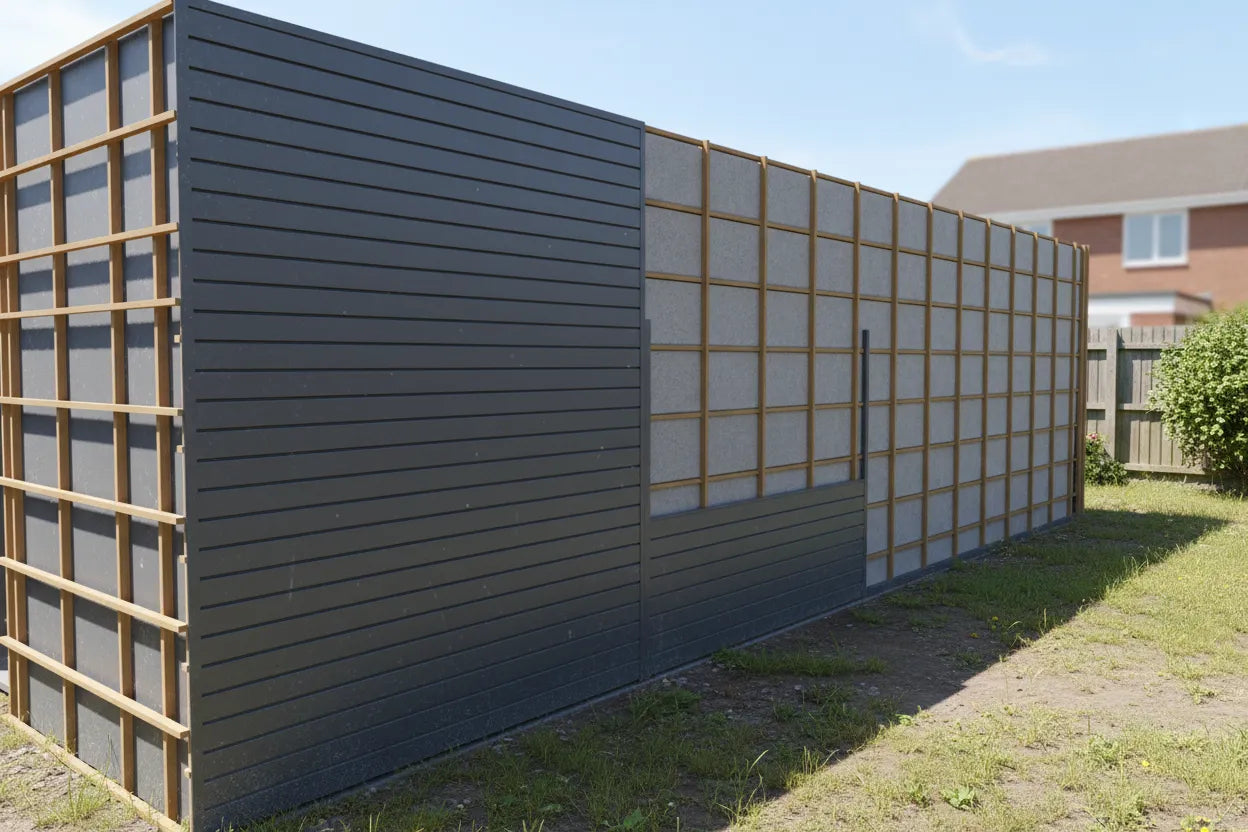
With all sections installed, your cladding façade should now present a clean, uniform, and professionally finished appearance.
Important reminders:
- Do not use an angle grinder to cut the material, as it will damage the protective surface.
- Always allow adequate space for thermal expansion throughout the installation.
- Confirm that your framing and material layout align with the building’s edges before installation begins. Cutting a panel after it has been installed is significantly more difficult than adjusting a loose panel.
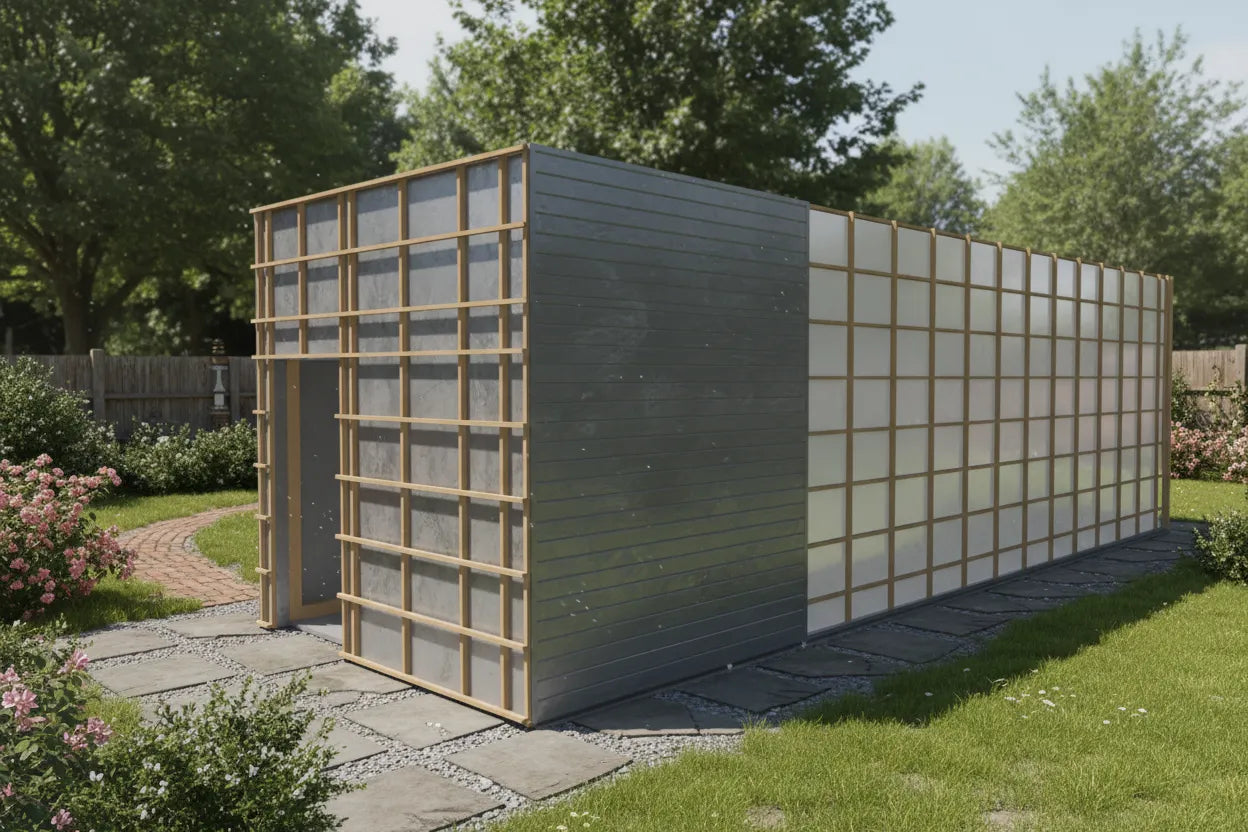
Our cladding collection explained
Clarification on the unique characteristics and differences of each cladding panel
MAVLLI offers 3 distinct cladding options, each featuring its own structural finish.
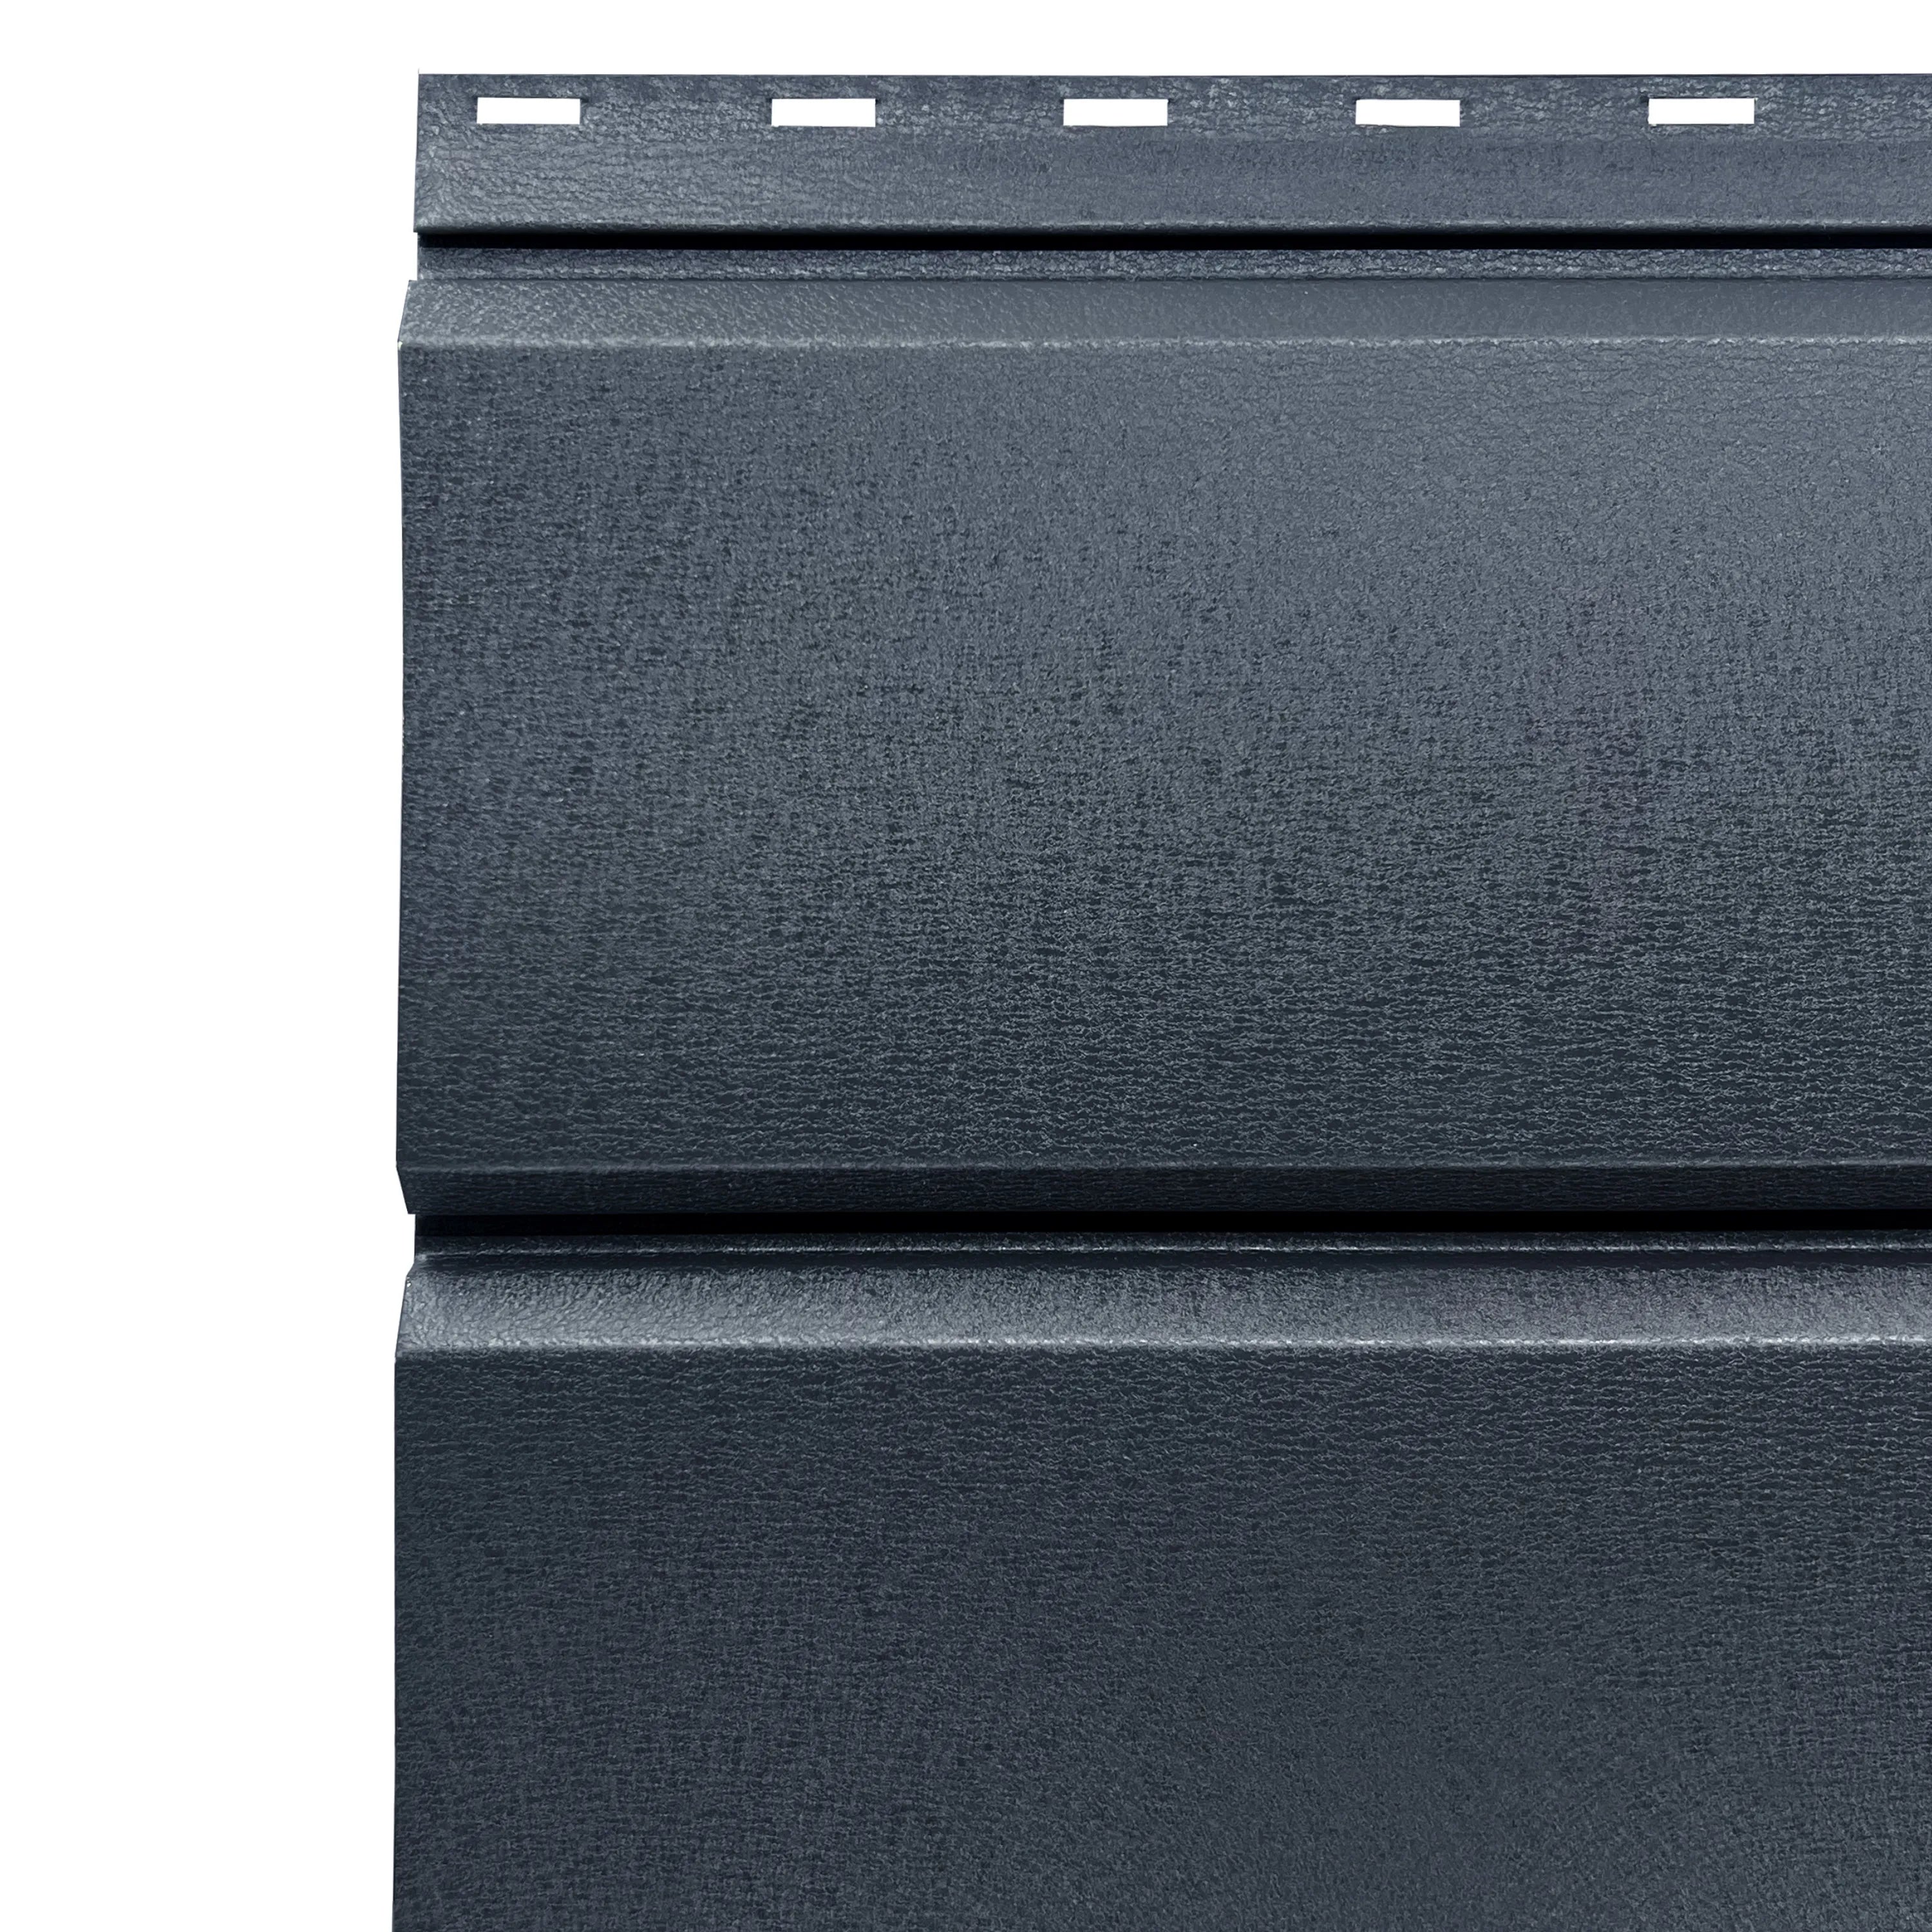
Classic
Has flat surfaces mimicking typical wooden slats
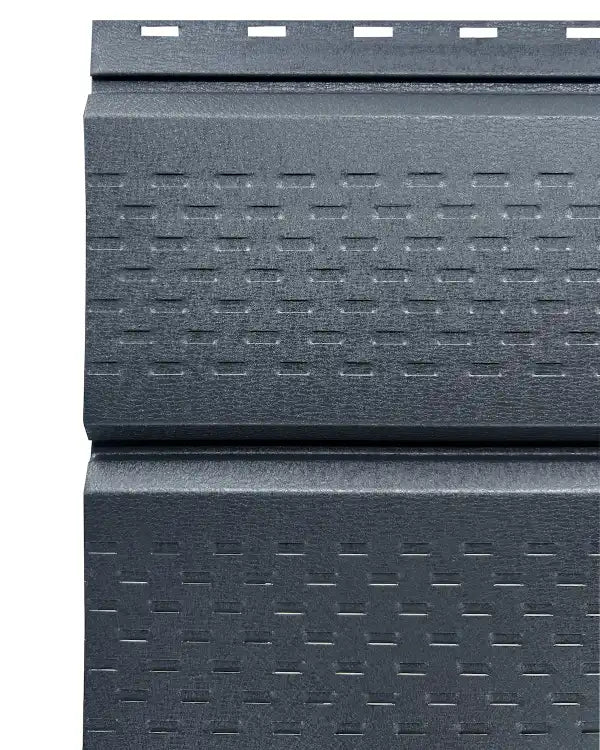
Perforated
Utilizes small square indentations to promote humidity escape and air circulation, typically installed beneath the roof for enhanced airflow.
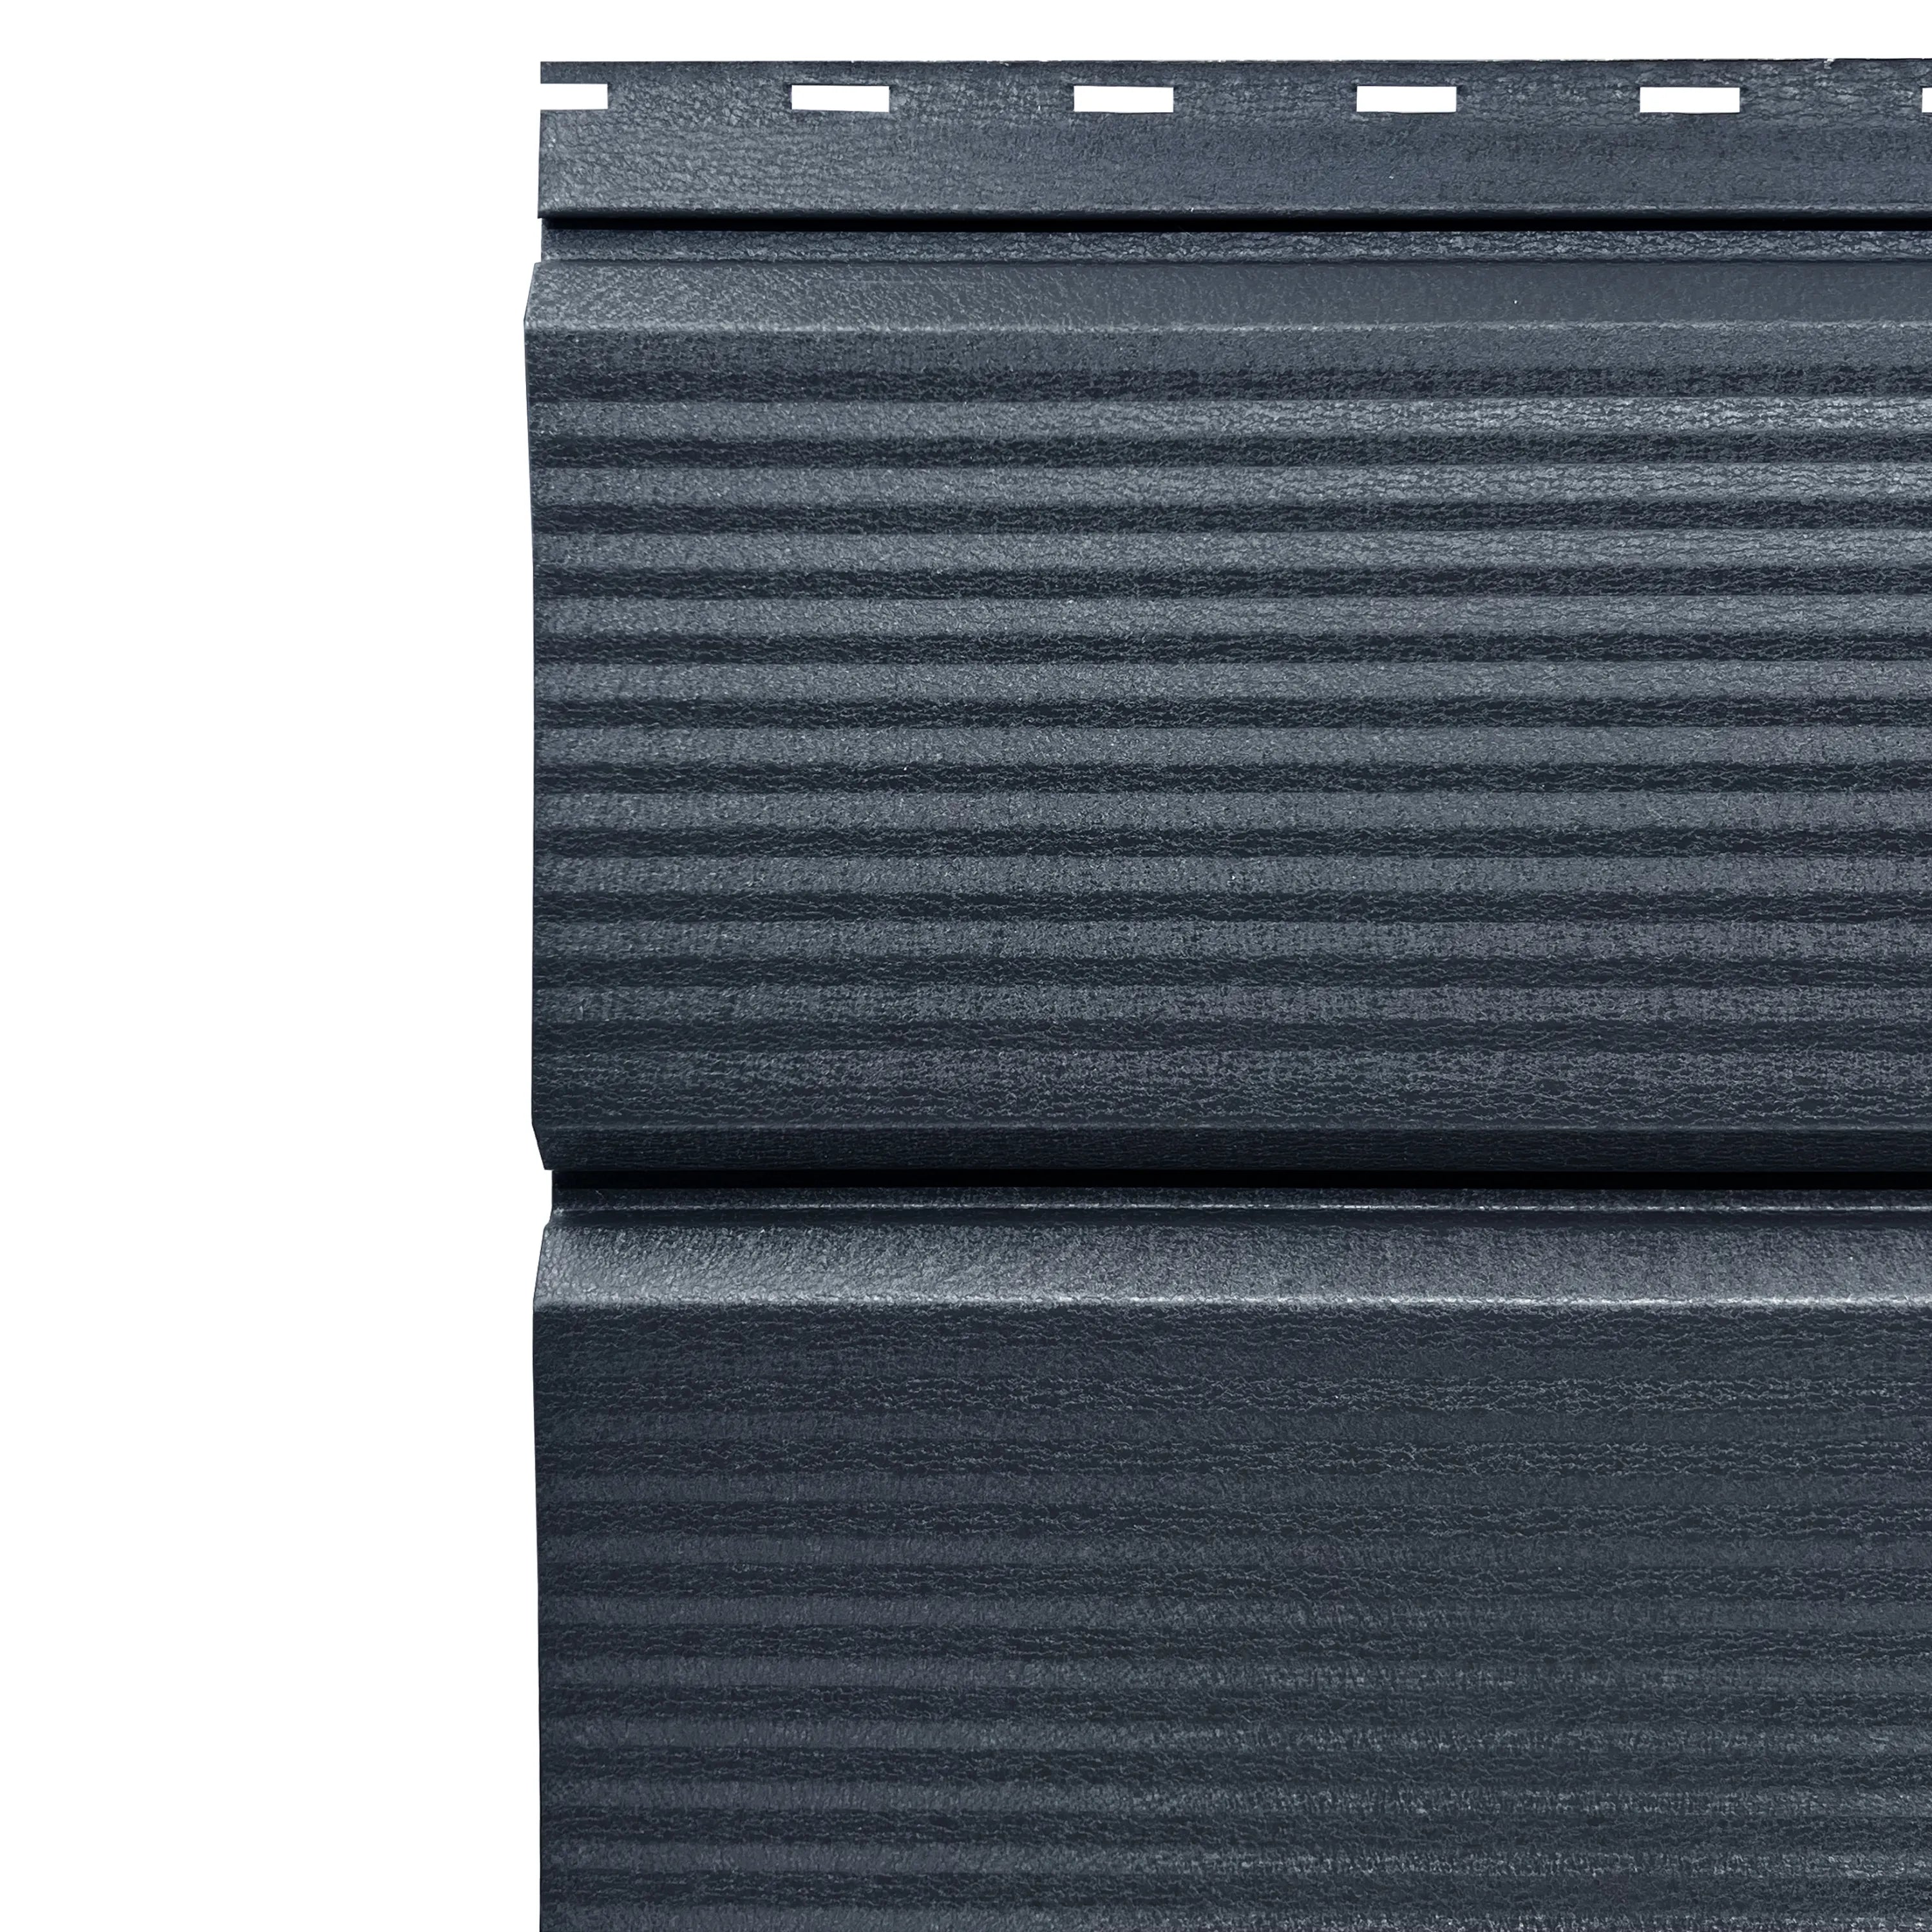
Ribbed
Provides the cladding with a unique finish, causing light to reflect in various ways off the small indentations.